
How to create exercises?
Library → Exercises is one list with your exercises and those in TrainerStudio's libraries (how to search and use them). When you can't find the one you need, create it: only the name is required. Save a basic exercise in seconds and complete it whenever you need to.
The same form lets you add instructions, tags, photos, videos, links, classification and workload control. Your exercise is then ready to find, program and show to clients.
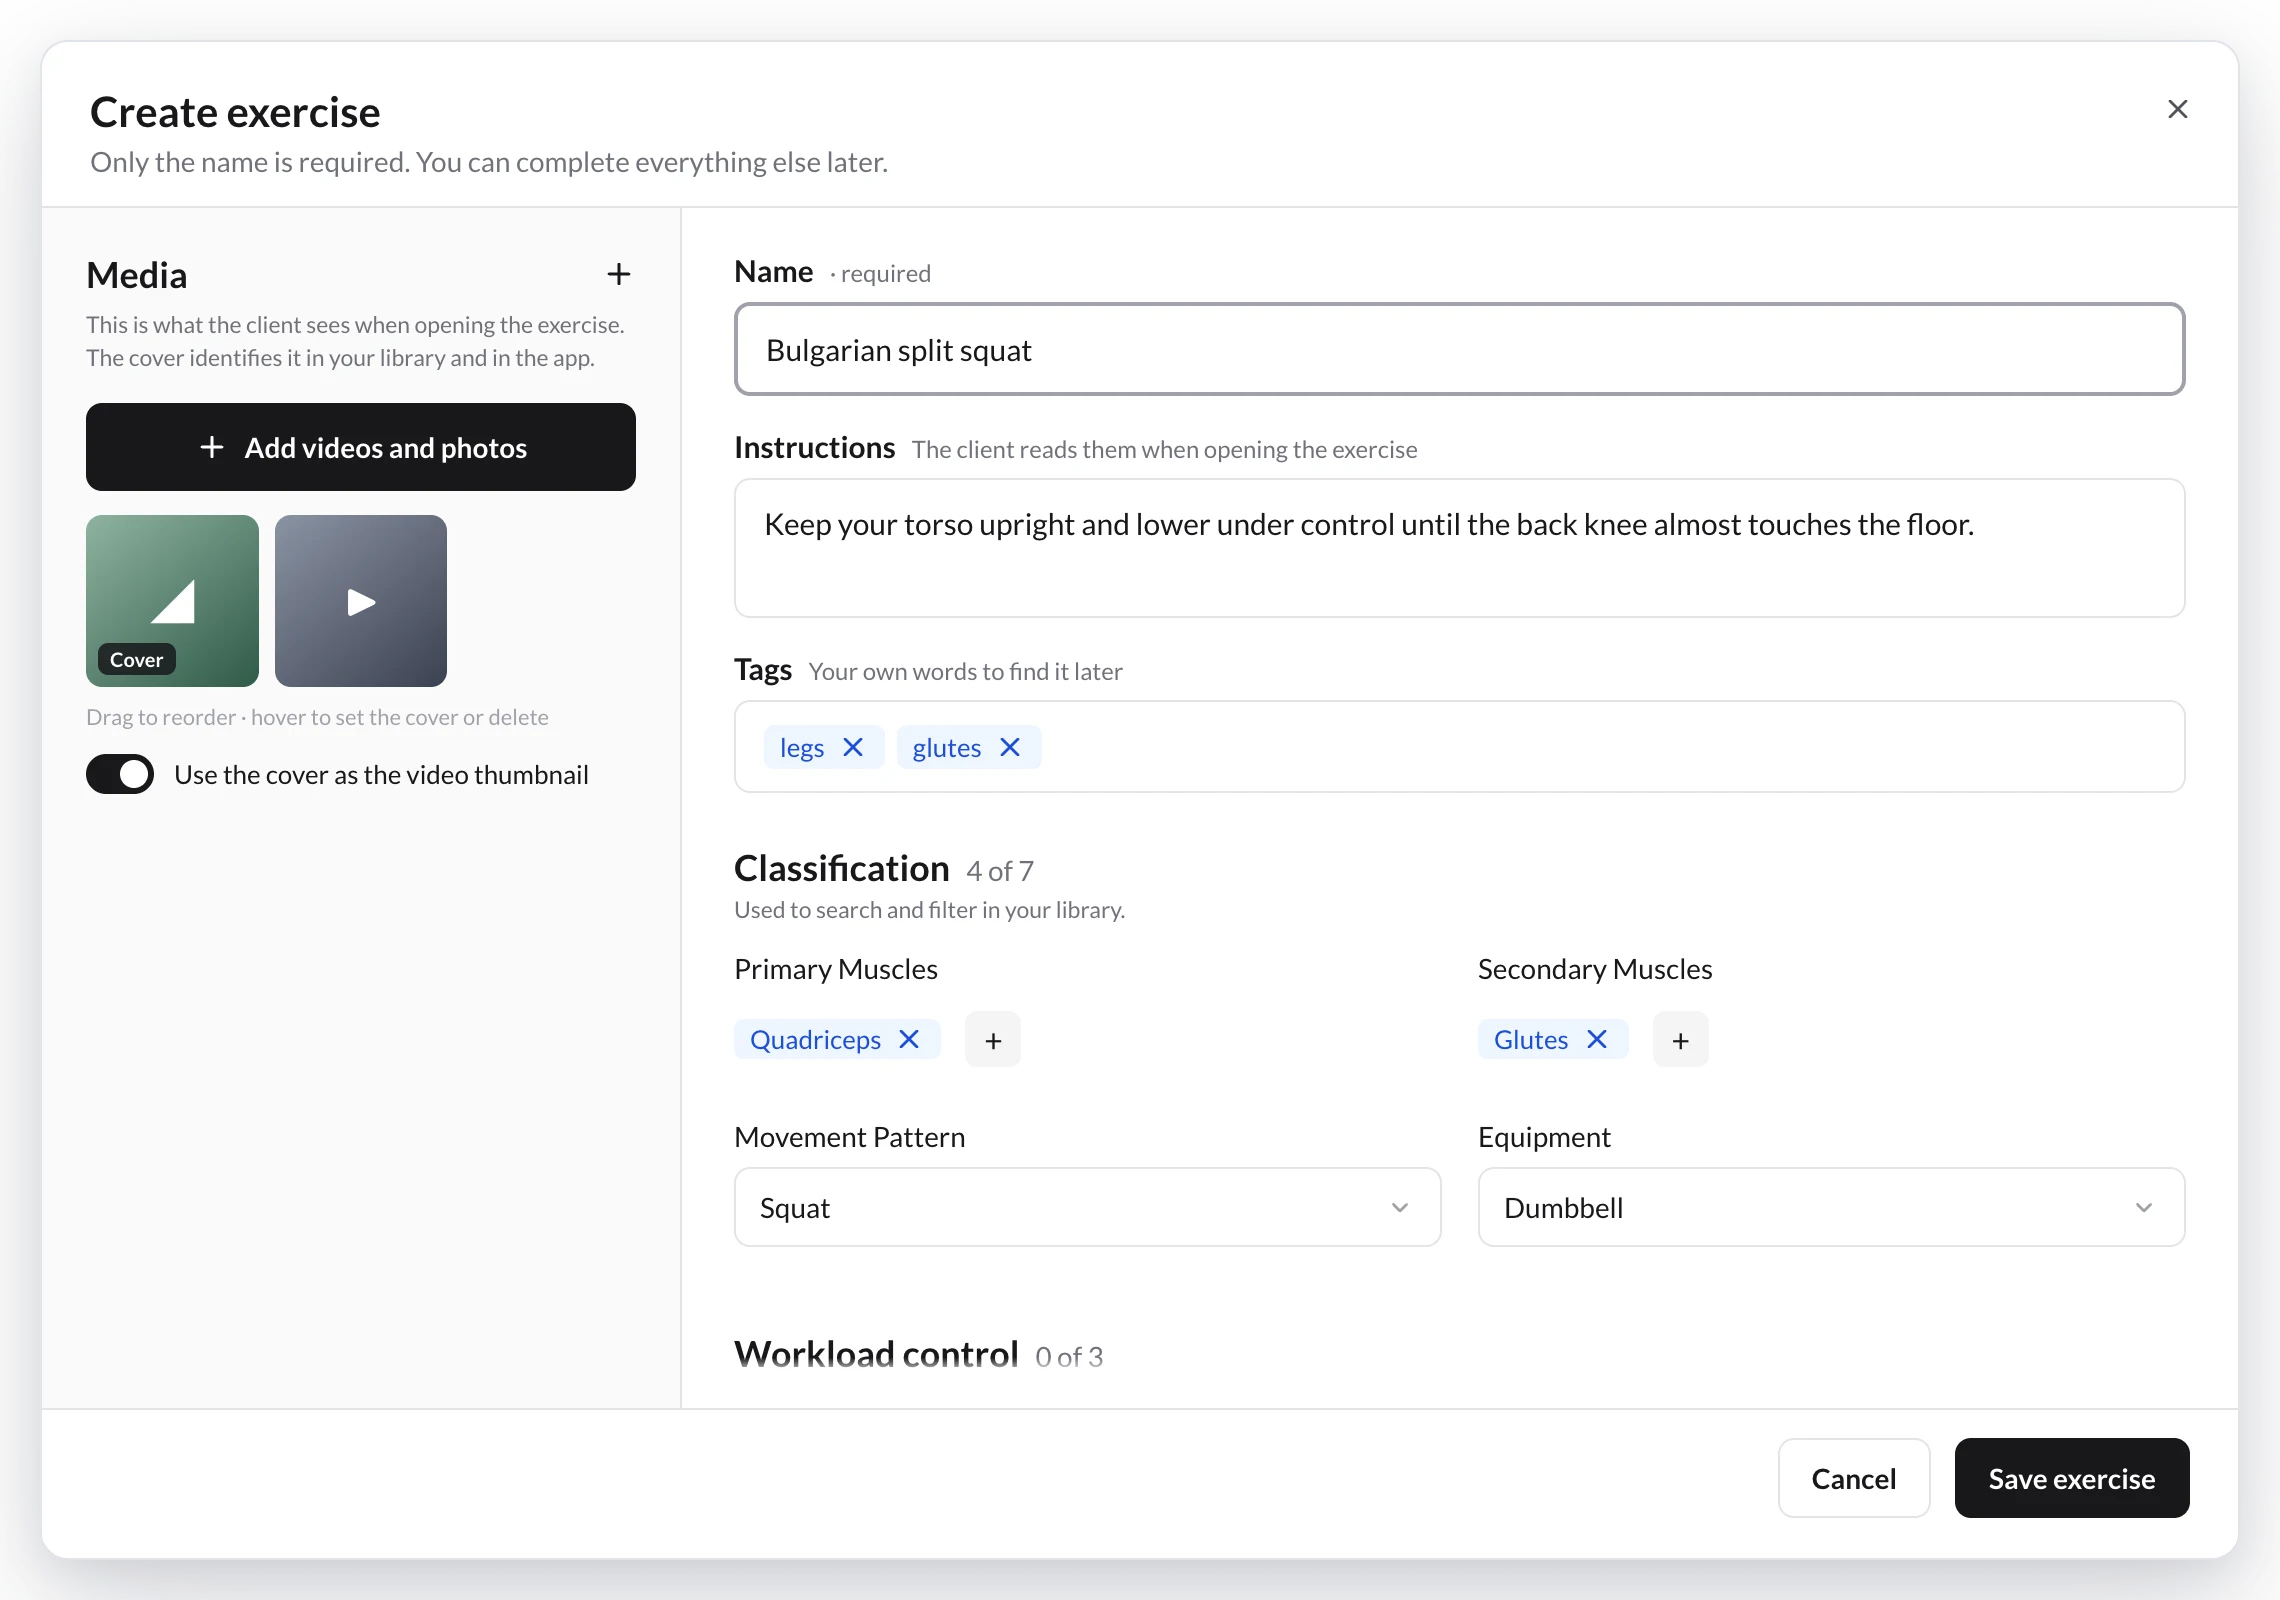
On computers and tablets, what the client will see stays on the left and the exercise details on the right.
1. Open your exercises and click Create
Go to Library → Exercises and click Create in the top-right corner.
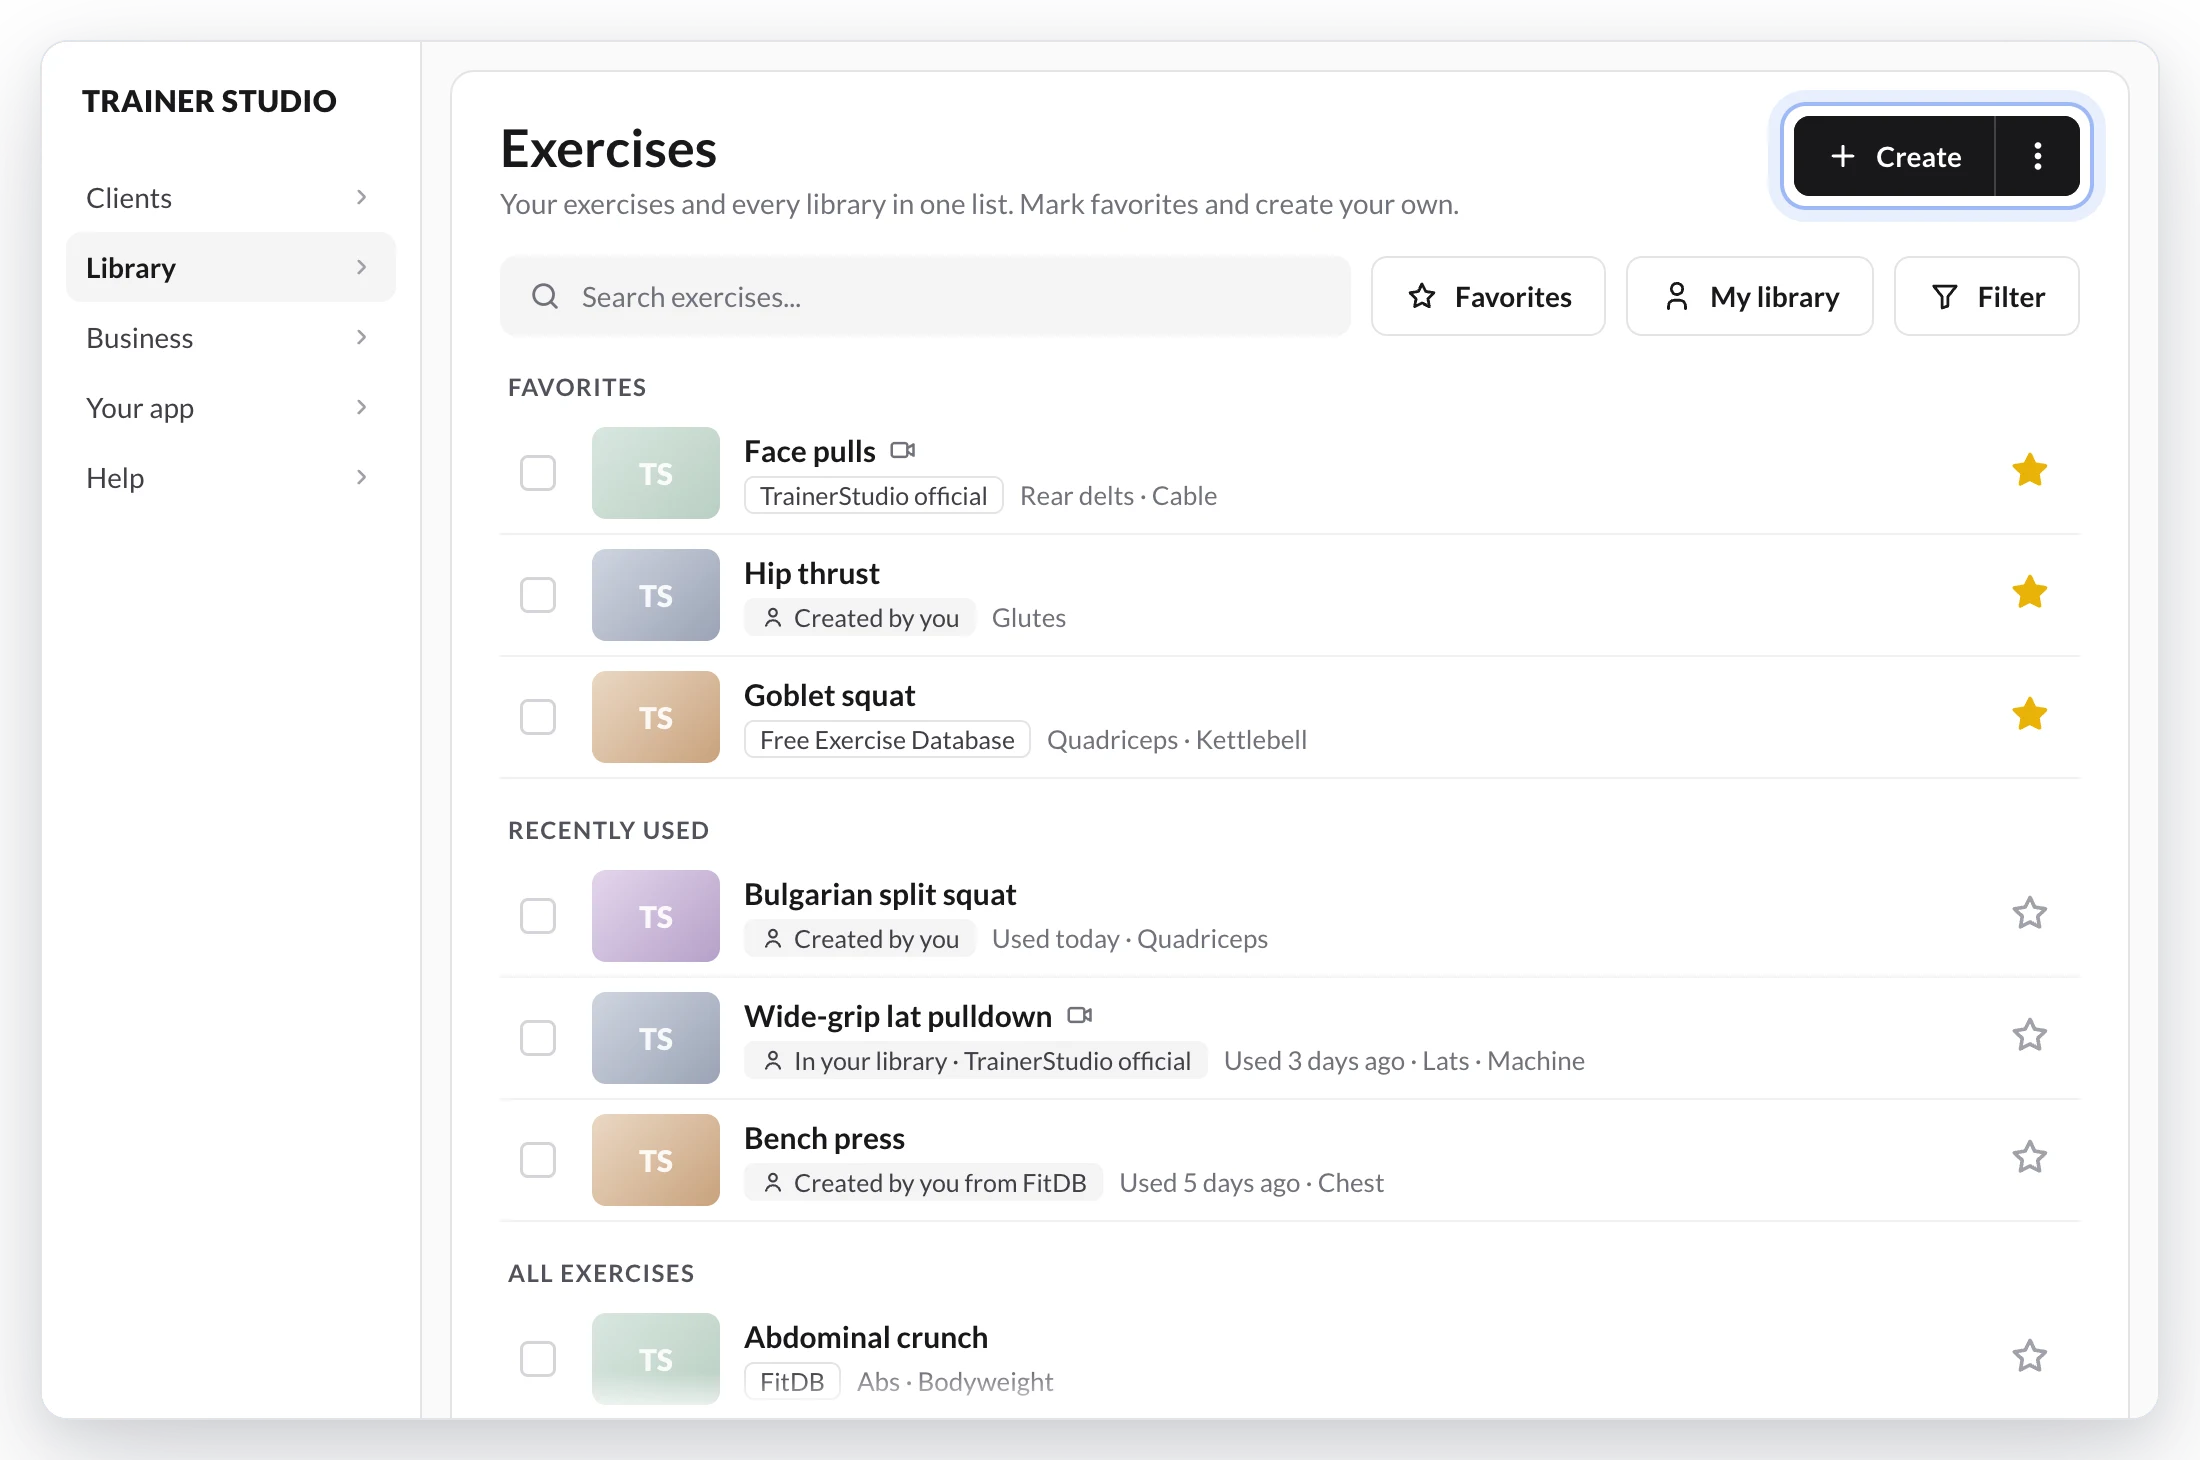
The exercises you create show up in the same list, labelled “Created by you”.
To add many at once, open the ⋮ menu next to Create and choose Upload from Excel.
Without leaving the plan
You can also create an exercise while you program. In the Add exercise search of a plan, program or template, type the name. If none of the results is the one, click Create “…” at the bottom of the list (or Create exercise if you haven't typed anything yet): the same form opens with the name already filled in. When you save it, the exercise is added straight to where you were.
2. Fill in the exercise details
Start with the name, the only required field. While something is missing, the form's footer tells you what (for example, "Give the exercise a name") and the Save exercise button stays disabled.
- Name (required): use a clear, recognisable name, such as "Bulgarian split squat" or "Barbell bench press".
- Instructions: short, specific execution cues. The client sees them when opening the exercise.
- Tags: your own words to find it later, for example "legs", "glutes" or "warm-up". Type a tag and press Enter.
On computers and tablets the form has two columns: Media stays fixed on the left while the rest scrolls on the right. On a phone everything is on one screen that you scroll from top to bottom.
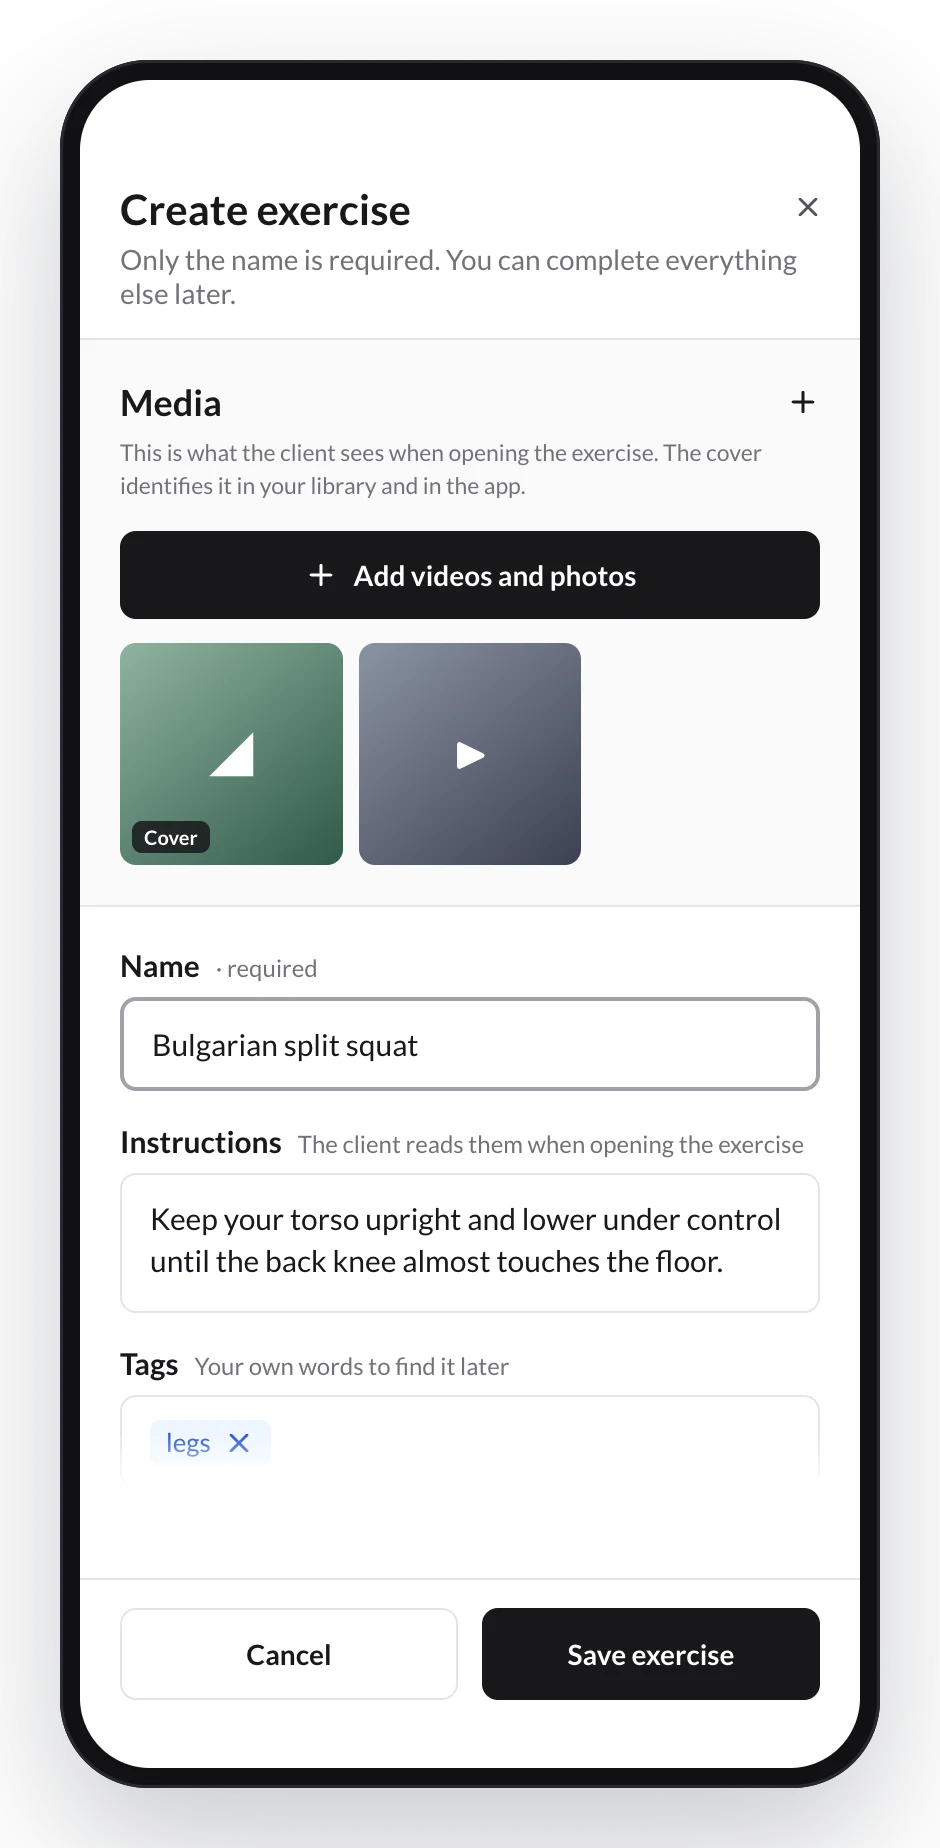
On a phone, the form fills the screen and the buttons always stay in sight.
If you already have one with that name
When you save, TrainerStudio checks whether your library already has an exercise with the same name (ignoring case and accents). If it does, it tells you with You already have “…”, the date you added it and how many workouts use it:
- Use the one I have: nothing new is created. If you were programming, the one you already had is added.
- Create another one anyway: saves the new one even though it has the same name.
If you already have duplicates from before, you can merge them into one.
3. Add the cover, videos and other resources
Under Media, click Add videos and photos. You can:
- Upload image or Upload video from your device (in the mobile app you can also pick from the Gallery or Take a photo).
- Paste a YouTube/Vimeo link.
- Add an External link to an article, a guide or another resource.
The first valid image automatically becomes the cover. You can also choose another image, a GIF or a YouTube video's thumbnail. On a computer, drag resources to reorder them and hover over one to make it the cover or delete it; on touch screens those two buttons are always visible.
If the exercise has a cover and a video, your client sees the cover as the video thumbnail, with a play button: the video starts when they tap it. If you'd rather they see the photo and the video separately, turn off Use the cover as the video thumbnail below the resources.
4. Classify the exercise and set up workload
Classification is optional, but it's used to search and filter in your library. Next to the title you'll see how many of its seven fields you've filled in:
- Primary Muscles and Secondary Muscles.
- Movement Pattern and Equipment.
- Force Type, Mechanic and Laterality.
Workload control is optional too. Its three fields — Load mode, CA · effort coefficient and Discipline — define how the exercise contributes to the client's load. If you leave them empty, you can still use the exercise normally, but it won't count towards load control. See how to set these values if you need examples.
5. Save the exercise
Click Save exercise. It appears in your exercise list labelled Created by you, ready to use in any plan, program or template.
To change it later, click it in Library → Exercises: the same form opens, now as Edit Exercise, with the Alternatives section below Media. There you choose which exercises your client can swap it for (how alternatives work).
FAQ
Which fields are required to create an exercise?▼
Only the name. You can create the minimum now and complete the instructions, media, classification and workload control later from your library.
Why is the save button disabled?▼
Because something is missing or a value isn't valid. The form's footer explains it next to the buttons, for example if the name is missing or a text is too long. While files upload, it shows "Uploading files…" with the progress.
How is the exercise cover chosen?▼
The first valid image, GIF or YouTube thumbnail is used automatically as the cover until you choose another one.
What happens if I create the exercise from a plan?▼
When you save it, it's added straight to the block you were in, without leaving the flow. If TrainerStudio tells you that you already have one with that name and you choose "Use the one I have", yours is added.
Can I start from an exercise in TrainerStudio's libraries?▼
Yes. Click it in Library → Exercises, change whatever you want and save: a copy is created in your library and the original doesn't change. We explain it in How to search exercises and use TrainerStudio's libraries?
Do I need to build my whole library before I start?▼
No. Start with the exercises in TrainerStudio's libraries, mark the ones you use most as favorites and create your own as you need them. Keep names and tags consistent so they're easy to find.
How to recover plans changed by mistake?
Open the planner's Change history, preview a saved version and restore it to get a client's plan back exactly as it was before.
How to search exercises and use TrainerStudio's libraries?
Search your exercises and those in TrainerStudio's libraries in one list, mark favorites, filter by library, edit any exercise without touching the original and merge duplicates.