
How to analyze videos with the Pose Tracker?
When a client attaches a video to an exercise so you can check their technique, you can open it in the Pose Tracker. The tool analyzes the video in your browser and lets you:
- Detect the body pose: it draws the skeleton (shoulders, elbows, wrists, hips, knees, ankles and nose) at every moment of the video.
- Follow trajectories: tick a joint and you'll see the path it takes during the rep.
- Follow any object: the barbell, a dumbbell or any point you choose, even if it isn't part of the body.
- Correct and annotate: move points frame by frame and draw reference lines on the video.
The Pose Tracker is in testing and may contain errors. If you have suggestions, the screen itself has a link to message us on WhatsApp.
1. Open a video in the tracker
The usual way is from your client's activity feed:
- Open the client's profile and go to Activity Feed.
- Expand the workout and find the exercise with the video under Attachments.
- Click Track pose on the video. The button only appears on videos, not on photos.
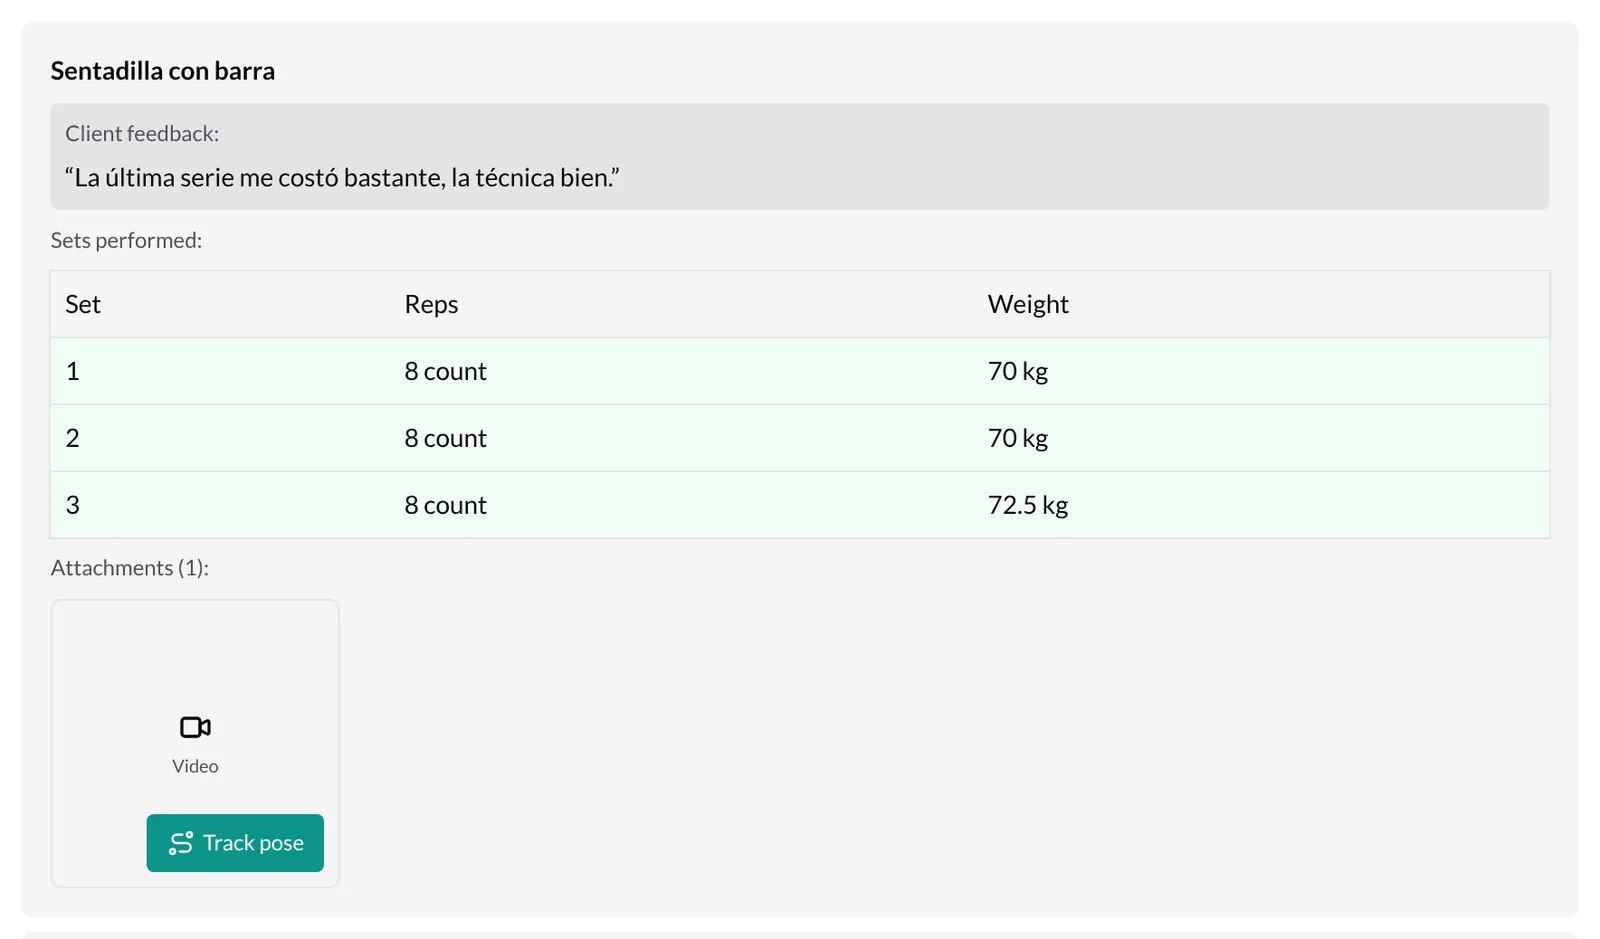
You can also open Pose Tracker from the client's section menu and click Upload video (or Select video) to analyze a video from your computer. That video only opens in your browser: it isn't uploaded to TrainerStudio and your client doesn't see it.
More about the feed and attachments in How to review a client's activity and notes?.
2. Choose what to analyze
When the video opens you'll see its name and two options:
- Track body pose (Detects body skeleton · Fast (MediaPipe)): finds the body's joints throughout the video. This is the option for checking knees, hips, shoulders…
- Track an arbitrary point (Barbell, dumbbell, any object · Slower): follows the point you mark, for example the end of the barbell. The first time it takes a little longer because it downloads the components it needs.
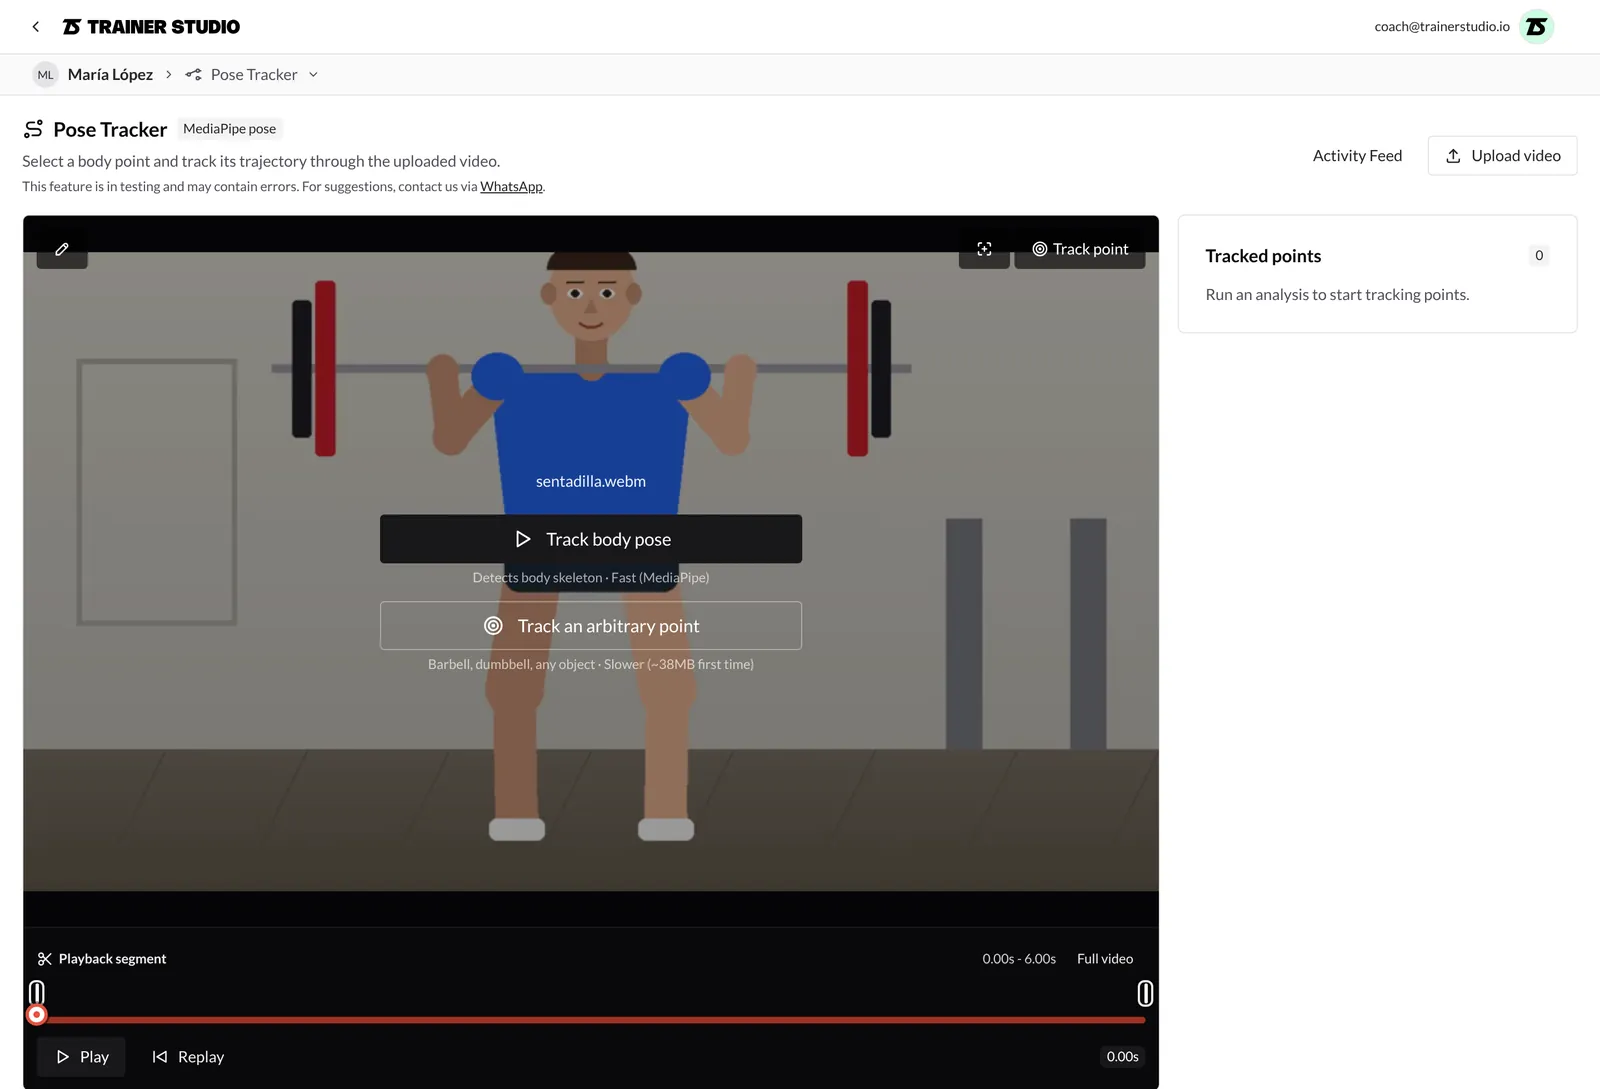
You can use both on the same video, in any order.
Analyze only part of the video
Below the video is the Playback segment. Drag the two handles at the ends to keep only the part you care about (for example, a single rep): analysis and playback are limited to that segment. Full video selects the whole video again. Each analysis covers at most 60 seconds, so for long videos it's worth narrowing the segment.
3. Detect the pose and follow joints
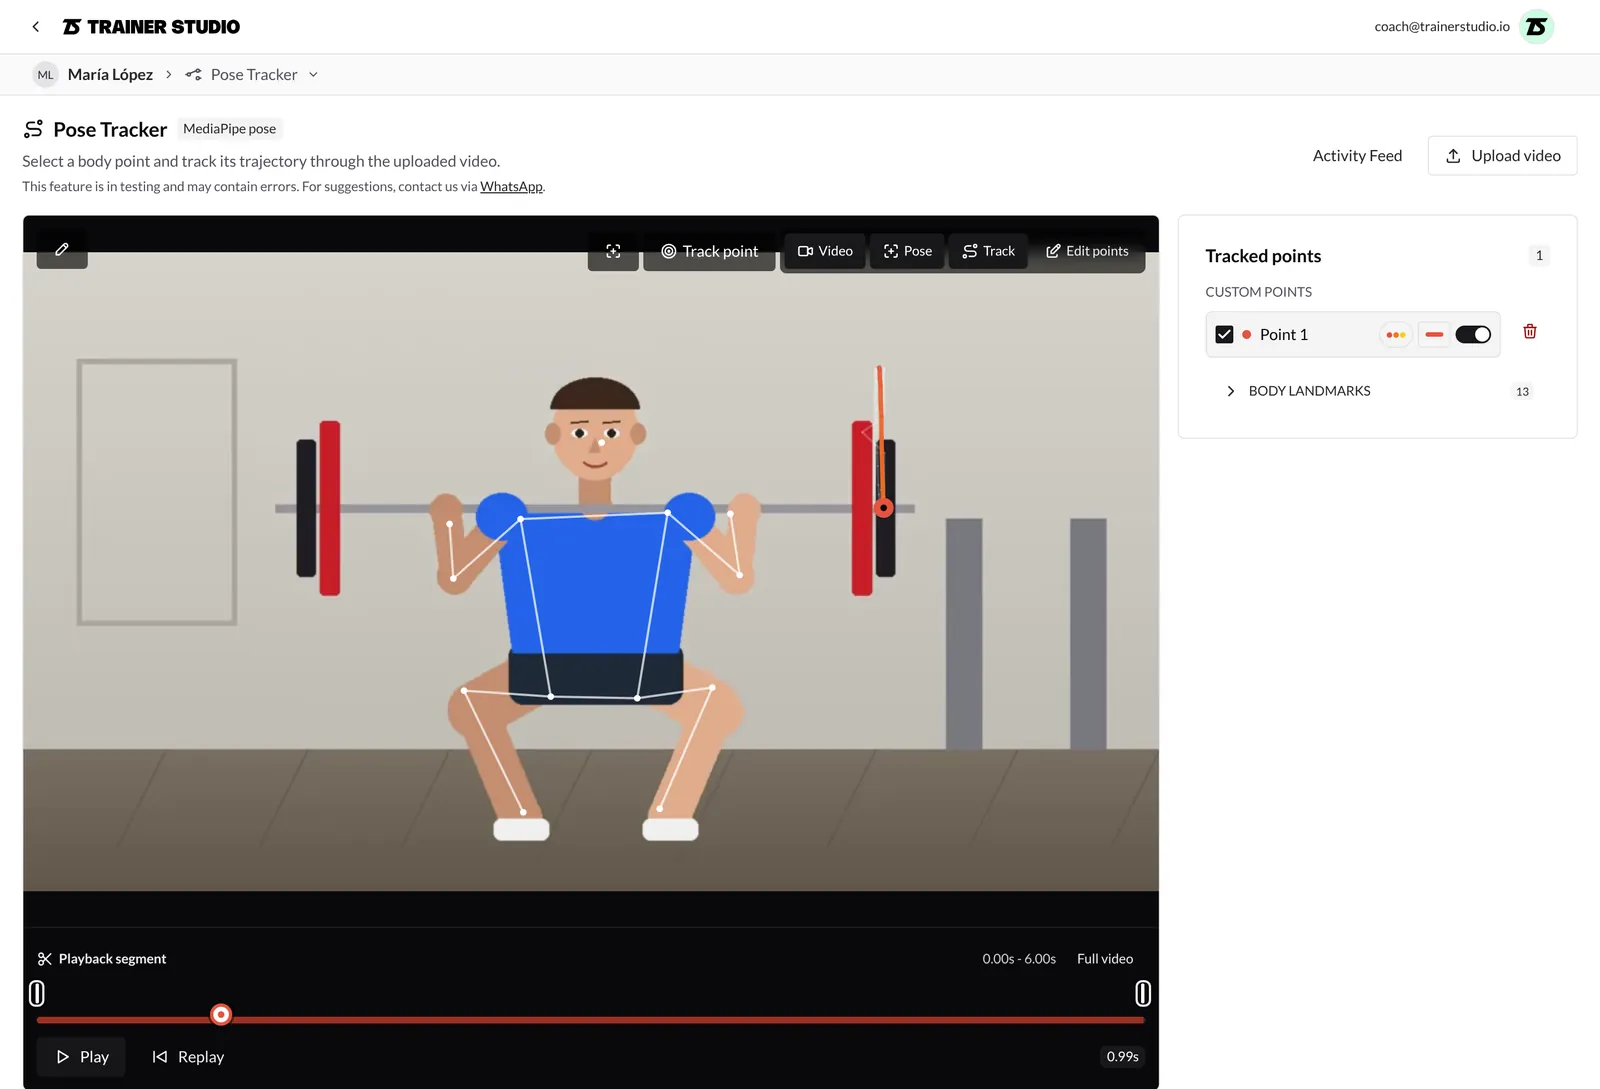
Click Track body pose. The right-hand panel shows the progress (Sampling pose frames) with its percentage and a Cancel button. When it finishes, the skeleton is drawn on the video.
To follow a joint:
- In the Tracked points panel, expand Body landmarks and tick the ones you want (for example, Left knee or Right wrist). You can also click the joint directly on the video while it's paused.
- Click Play or drag the time slider. On the video you'll see each point's trajectory: a thin line with the full path and a thicker line with the path covered up to the current moment.
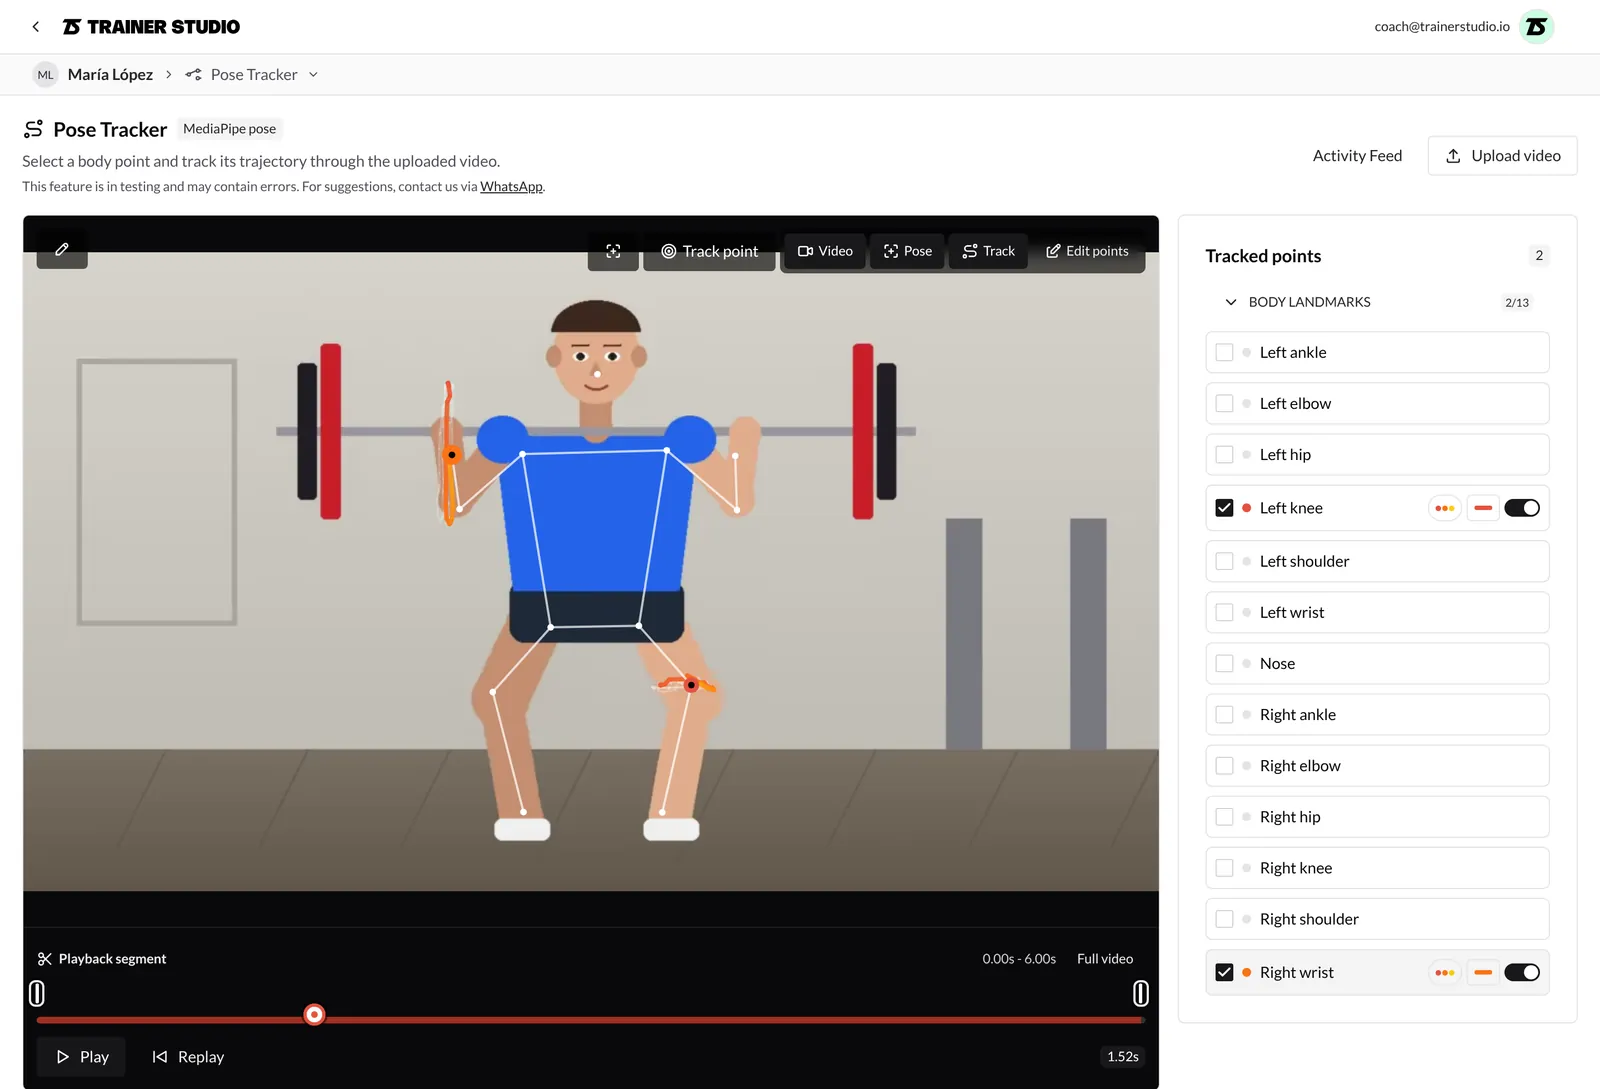
Each ticked point has three controls on the right:
- Palette: the colors of its trajectory (Rainbow, Warm or Cool).
- Line thickness: from 1 to 8 px.
- Temporal gradient: when on, the trajectory's color changes over time, which helps you see at what point of the rep it passes through each spot; when off, the line is a single color.
4. Adjust and re-run the analysis
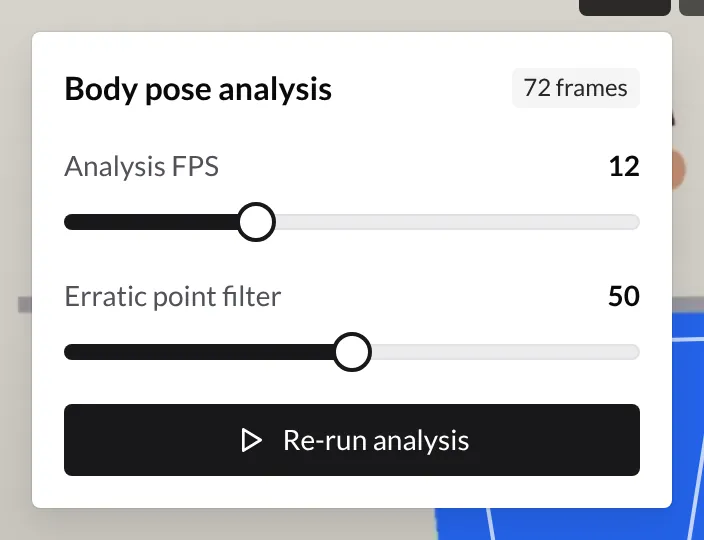
The crosshair button, at the top right of the video, opens Body pose analysis:
- The label shows how many frames will be (or were) analyzed and, if any, how many jumps were filtered.
- Analysis FPS (6 to 24; 12 by default): how many frames per second are analyzed. More FPS give more detailed trajectories, but the analysis takes longer.
- Erratic point filter (0 to 100; 50 by default): discards points that jump abruptly from one frame to the next. Low values filter more; high values are more permissive. The change applies to the trajectories immediately.
- Run analysis / Re-run analysis: analyzes the video again, for example after changing the FPS or the selected segment.
5. Follow the barbell or any object
To see the path of the barbell, a dumbbell or any other point:
- Pause the video on a frame where the object is clearly visible.
- Click Track point (top right of the video) or Track an arbitrary point. The hint Click on the barbell, dumbbell, or any object to track appears.
- Click the object. Pick a spot with well-defined edges, such as the end of the bar or the edge of a plate.
- Wait for it to finish: the button shows the percentage and the panel shows Tracking custom point (the first time, the required components load first). You can Cancel at any time.
The point appears under Custom points as "Point 1", "Point 2"…, with the same palette, thickness and gradient controls as the joints. The trash icon deletes it. You can add several points.
6. Show or hide layers and correct points
Once there's an analysis, these buttons appear at the top right of the video:
- Video, Pose and Track show or hide the video, the skeleton and the trajectories. For example, hide the video to see only the lines on a black background.
- Edit points turns on manual correction: drag any point on the video to place it where it should be in that frame. In this mode you also get:
- The ‹ and › arrows (Previous frame and Next frame), to step through the analyzed pose frames one at a time.
- Delete point, which removes the selected joint in the current frame (useful when detection gets a specific frame wrong).
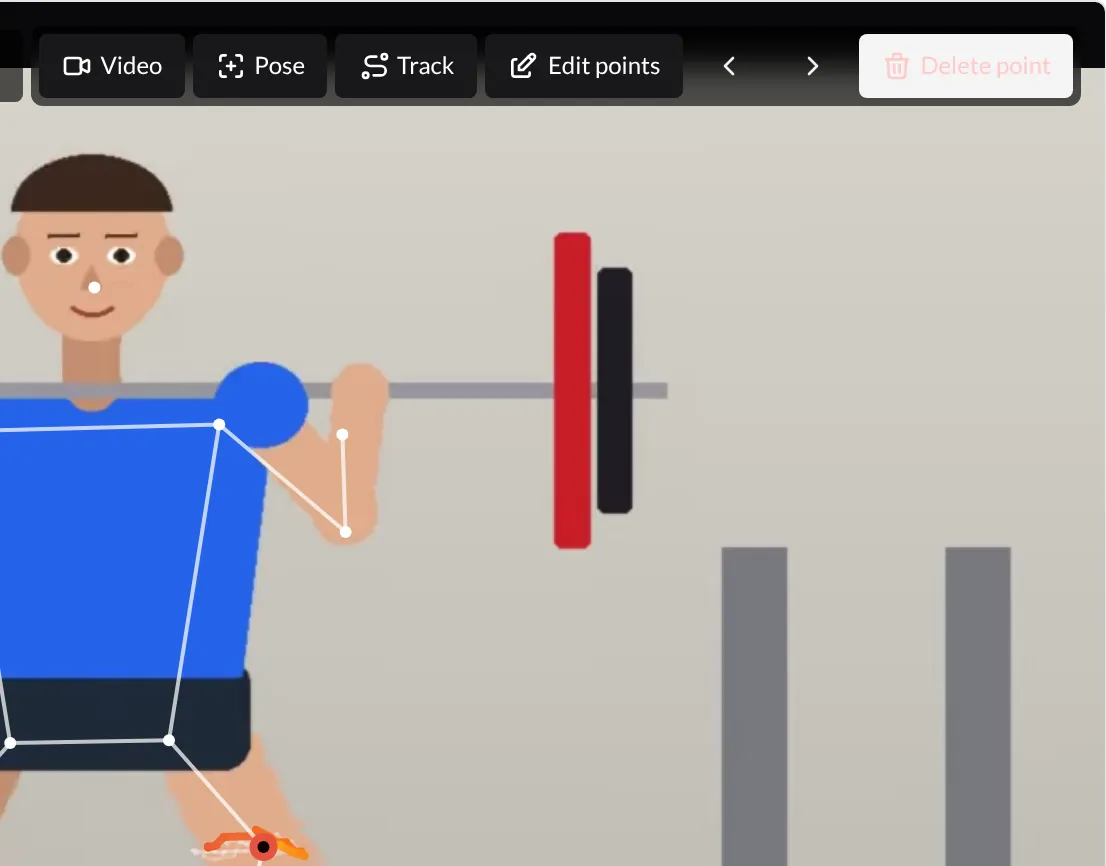
You can't edit points or draw while the video is playing: pause it first.
7. Draw on the video
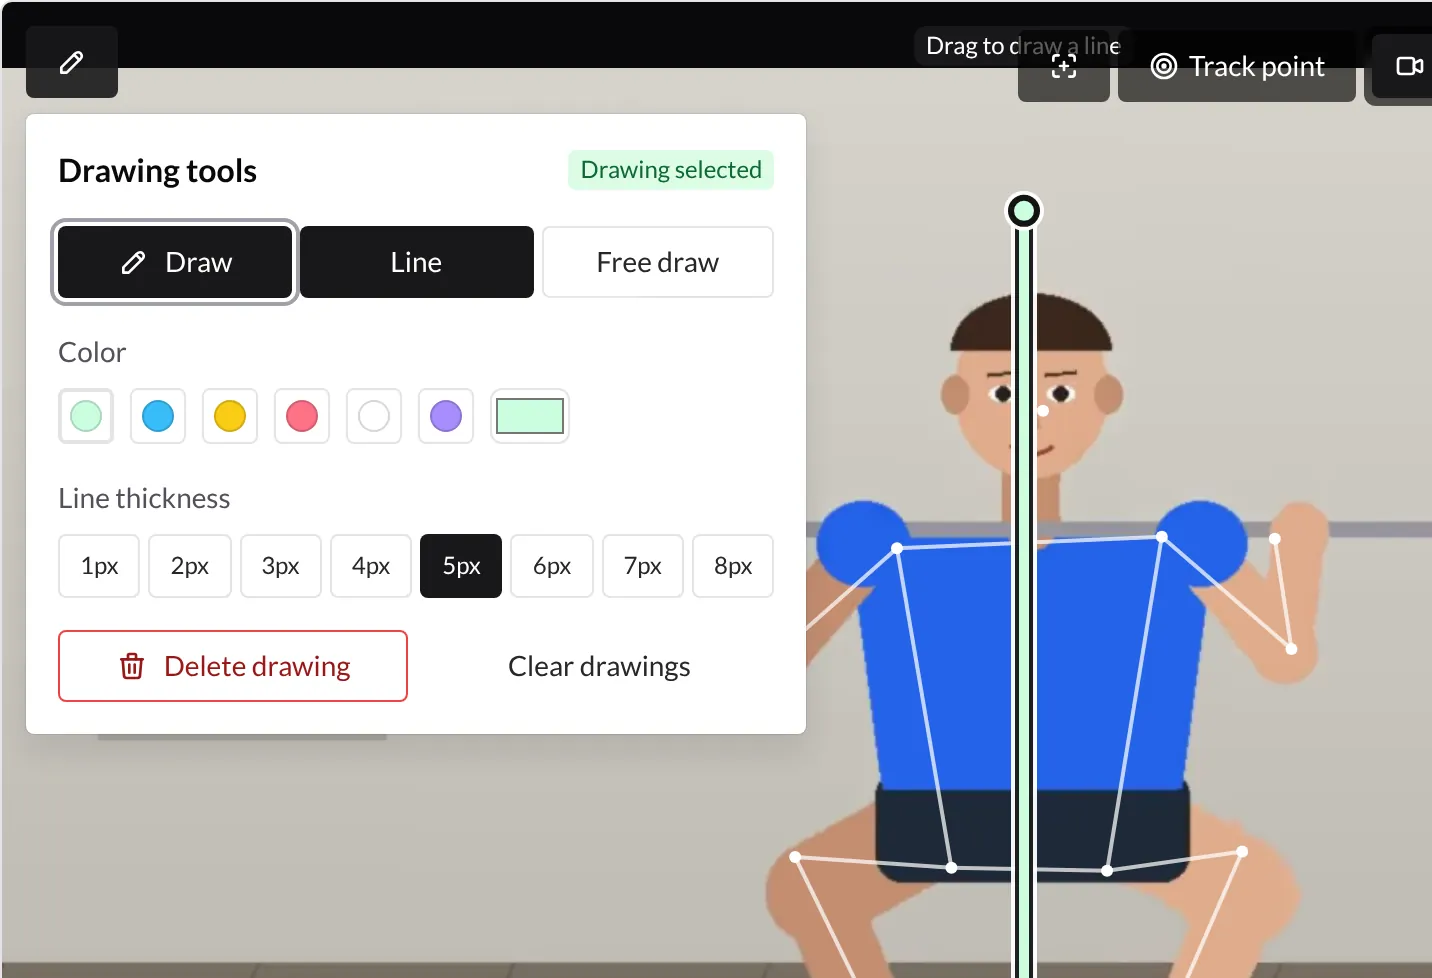
The pencil button, at the top left of the video, opens Drawing tools:
- Draw turns drawing mode on or off.
- Line draws straight lines (for example, a vertical reference) and Free draw, freehand strokes.
- Color and Line thickness (1 to 8 px) apply to new drawings and to the selected drawing.
- Delete drawing removes the selected drawing and Clear drawings, all of them.
With drawing mode on, drag on the video to draw. Click a drawing to select it and drag it to move it. Drawings stay fixed while the video plays, so they work as a reference for the whole rep.
Good to know
- Nothing is saved. The analysis, points and drawings disappear when you leave the page or open another video. To share the result with your client, take a screenshot and send it, for example through the chat.
- Your client doesn't see the tracker. It's a tool just for you; the original video stays attached to the exercise as usual.
- Better videos, better results. Detection works best with one person in the frame, the whole body visible, a fixed camera and good light.
- Everything happens in your browser. Long videos or a high analysis FPS take longer; narrow the segment to go faster.
Related guides
How to review a client's activity and notes?
Use the activity feed to see a client's workouts, metrics, photos and forms at a glance, and keep private notes that only you can see.
How is the compliance % calculated?
Compliance measures how much of what you program each client actually does. It is your retention alarm — when it drops, that client is more likely to cancel. What it means, how it is calculated and how to act when it falls.