
How to organize your clients into groups?
When you have many clients, groups keep them organized: by format ("Online", "In person"), by goal ("Fat loss"), by schedule or by whatever you need. With groups and the filters of the Customers list you find who you are looking for in seconds and can apply bulk actions to all of them at once: add them to a group, assign a trainer, archive them, turn chat on or off, or assign them a program.
1. Create groups and add them to a client
- In Customers, press Options on the client's row and choose Manage groups.
- In Search or create a group, type the name. If the group already exists, pick it from the list; if not, press Create "…" or the Enter key.
- The client's groups appear under Groups assigned to this customer. To remove one, press the ✕ on its tag.
A client can belong to several groups at once. Each client's groups are shown in the Groups column of the list.
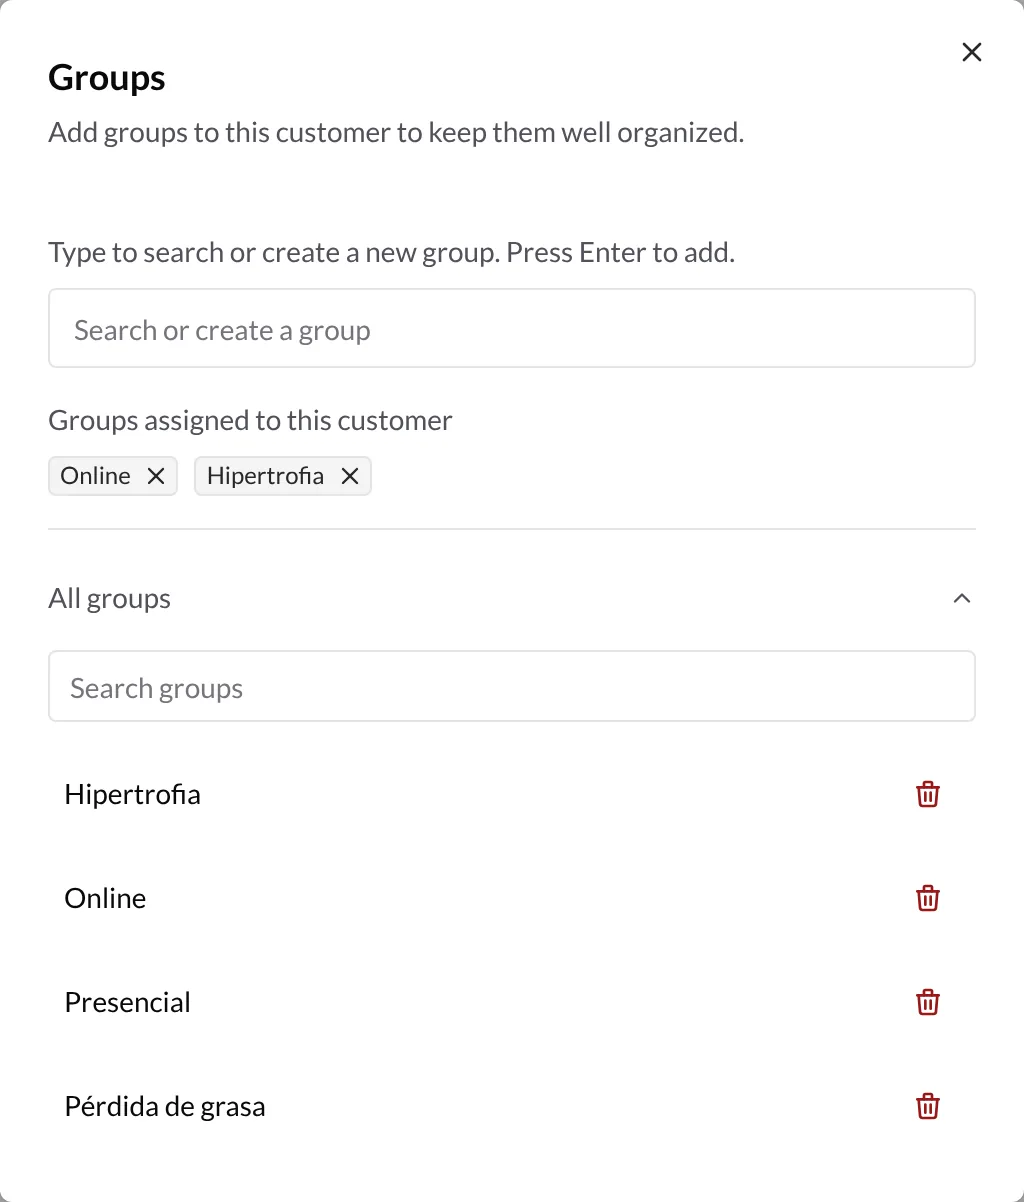
Delete a group
In the same window, expand All groups to see every group you have created. Press the trash icon next to a group and confirm with Delete group. The group is removed from all the clients who had it; the clients themselves are not deleted.
2. Filter the list by group and trainer
The top bar of Customers has these filters:
- Status: Active or Archived, with the number of clients in each.
- Groups: you can tick several at once.
- Trainers: if you have employees on your team, filter by one or more trainers, or by No trainer assigned.
- Search by name.
If you tick several groups (or several trainers) you will see the clients in any of them. Different filters are combined: for example, "Online group" + "trainer Sergio" shows only Sergio's online clients.
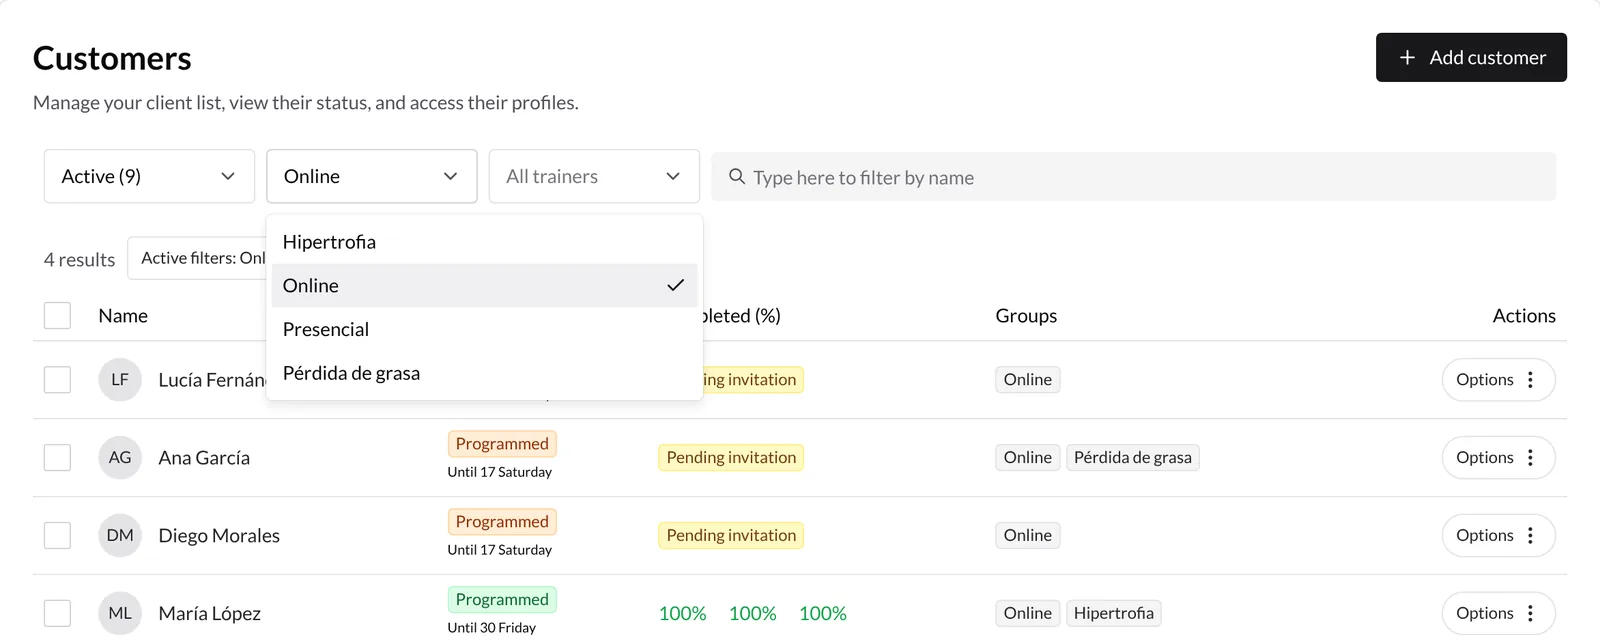
Below the bar you will see the number of results and an Active filters button listing the filters applied; press it to clear filters. Filters are saved in the page address, so you can bookmark it or go back with the browser.
On mobile, filters are behind the filter button at the top and let you choose one group at a time.
3. Select several clients
- Tick the checkbox of each client you want to include.
- The header checkbox selects every client loaded in the list.
- When you tick it, the link Select all N customers matching the filter appears, which extends the selection to all results of the filter, even those not loaded yet. If you then untick one, it is excluded from the selection.
When you select clients, the filter bar is replaced by the selection bar with the number of selected clients, the Bulk Actions button and Clear selection. Changing any filter clears the selection.
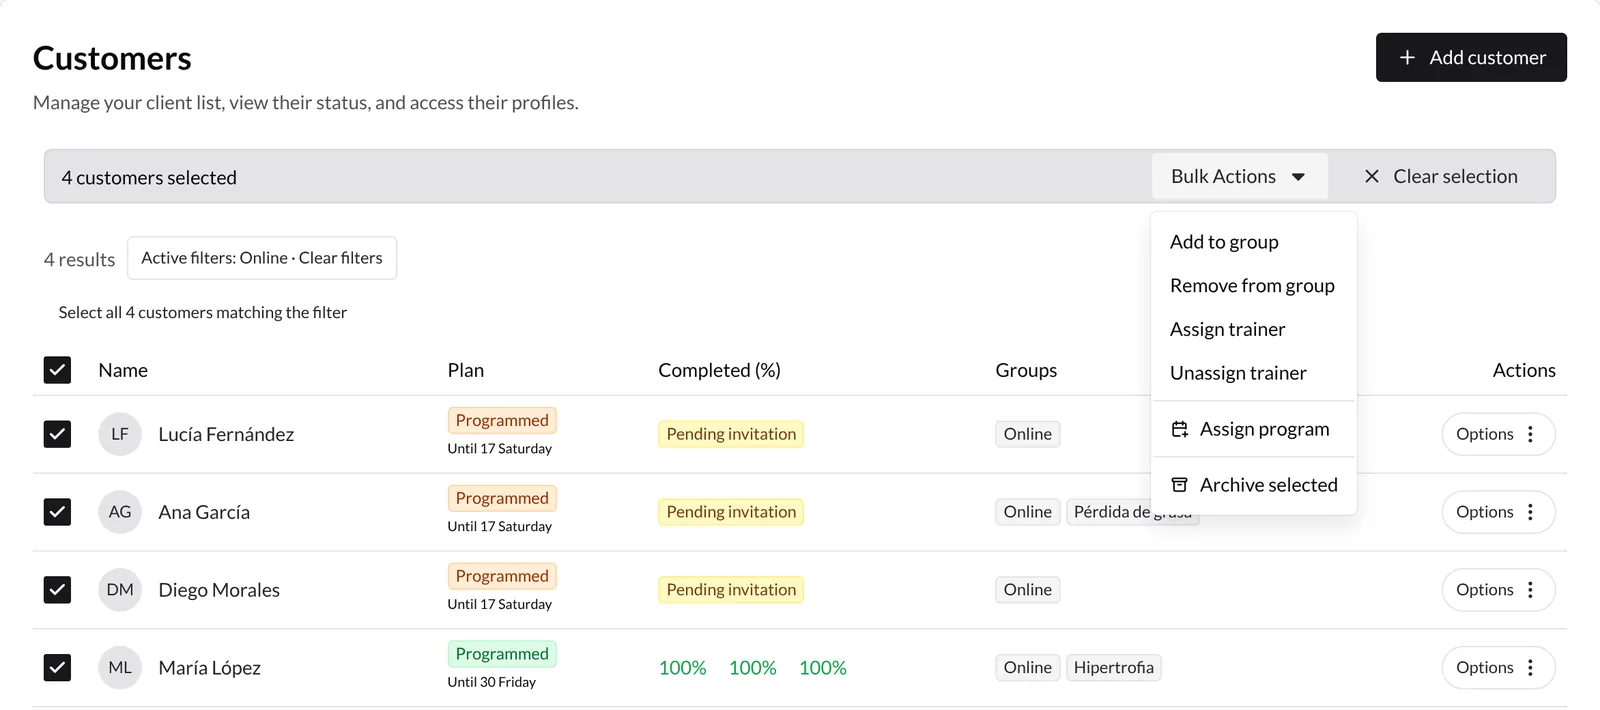
4. Apply a bulk action
Open Bulk Actions and choose an action:
| Action | What it does |
|---|---|
| Add to group | Adds the group to the selected clients without removing the ones they already have. If you type a new name, you can create it right here with Create «…». |
| Remove from group | Removes that group from the selected clients. |
| Assign trainer / Unassign trainer | Assigns or removes a trainer from your team. Only the account administrator sees these. |
| Assign program | Assigns a program with a start date and start day. Step by step in How to create and assign programs?. |
| Enable chat for selected / Disable chat for selected | Turns chat on or off for those clients. Only shown if you have chat enabled. |
| Archive selected | Archives the selected clients. |
| Activate selected | In the Archived view, activates them again (within the seats of your plan). |
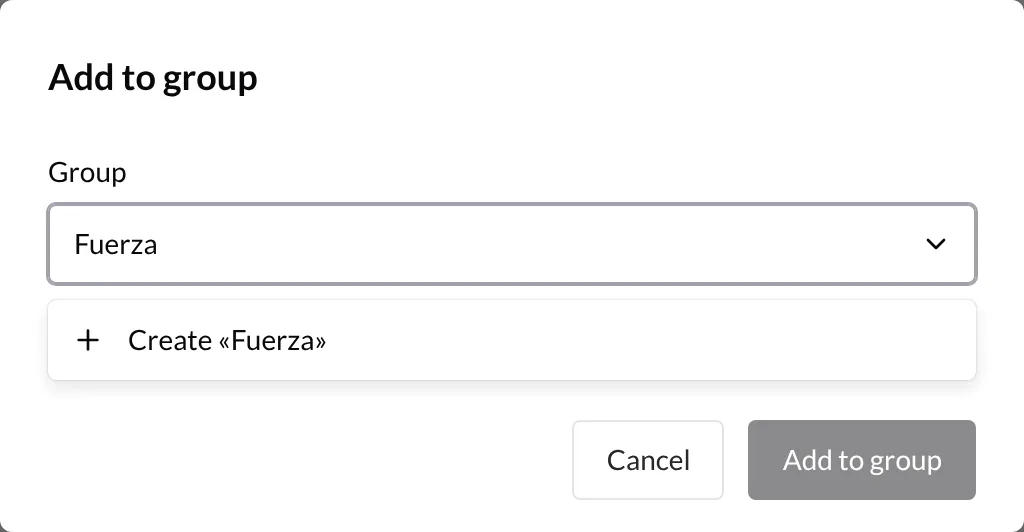
Before anything is applied, the window shows how many clients are affected and asks you to confirm. For groups and trainers, pick the group or trainer in the selector (it has search) and confirm.
5. Check the result and retry failures
When it finishes you will see a message with how many changes were applied, for example "4 of 4 applied". If some could not be applied (for example, when activating archived clients and you have no seats left on your plan), the message says so and only the clients that failed stay selected. That way you can fix the problem and repeat the action just for them.
Good to know
- Groups are just for you. Your clients do not see which groups they belong to.
- Adding does not replace. "Add to group" adds the group; it does not remove the client's other groups.
- No notifications to clients. Changing groups or trainers does not send notifications.
- Archived clients too. You can add or remove groups and trainers for archived clients.
- Capitals and spaces. In bulk actions, if you type an existing group with different capitals or extra spaces, the existing group is used.
- Selection by filter. "Select all N customers matching the filter" includes every result, not only the ones on screen.
Related guides
How to create clients?
Step-by-step guide to adding new clients to your TrainerStudio platform.
How to give my clients access to the app?
Each client has their own access link. You send it by WhatsApp, they tap it and they are in the app already signed in —no sign-up—. The first time they create their email and password, and from there they can install the app on their phone.