
Create and assign a form
Forms are saved in your library so you can reuse them with as many clients as you need. You then add them to each person's plan on a specific date.
1. Create the form
Go to Library → Forms and click Create. Enter an easy-to-recognize name, such as “Initial assessment” or “Weekly check-in,” and add an optional description to explain its purpose.
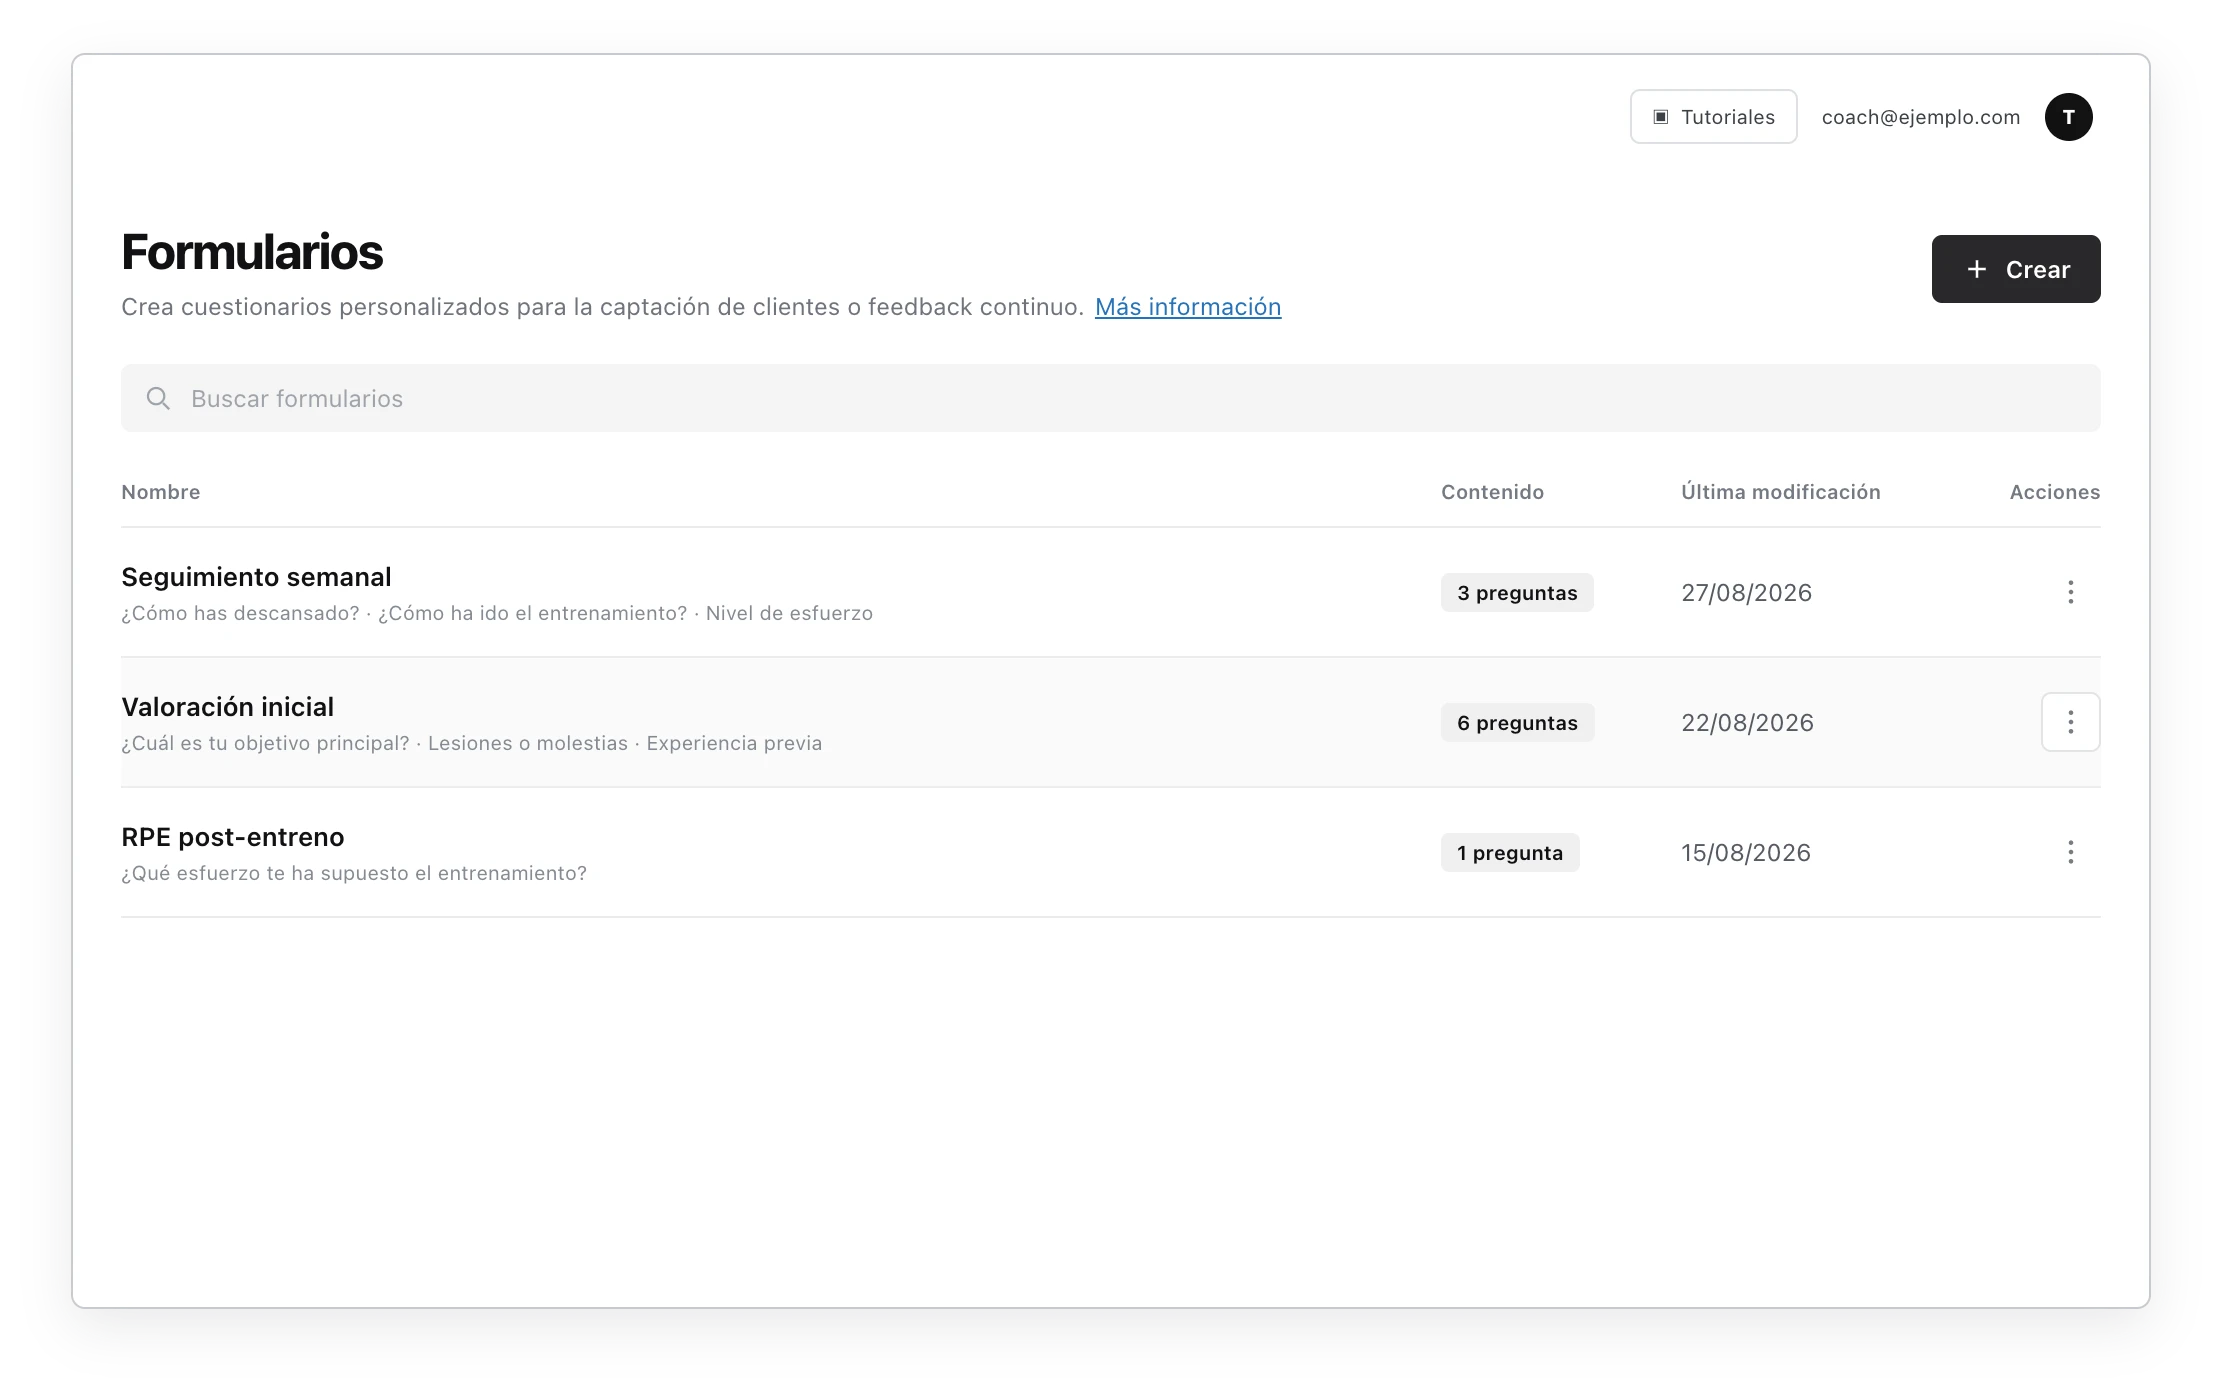
You can combine four question types:
- Free text: for open responses such as discomfort, observations, or changes during the week.
- Single choice: the client selects one option.
- Multiple choice: the client can select every option that applies.
- Scale: the client chooses a number within your range, for example from 1 to 10.
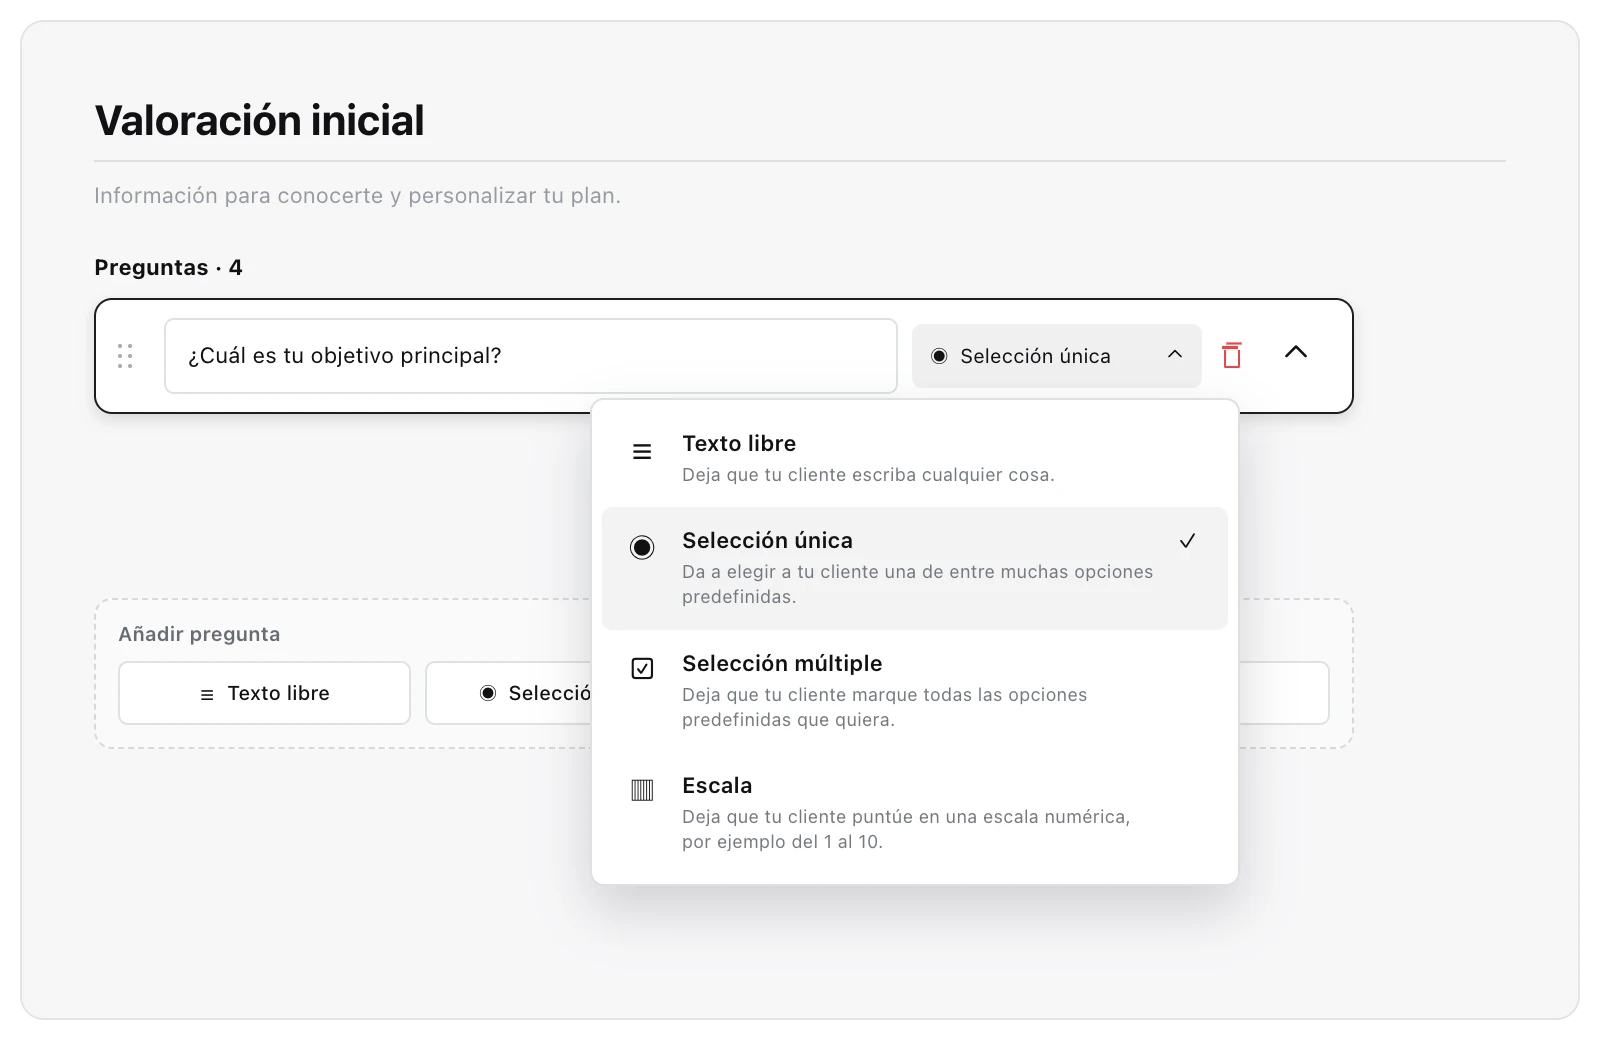
Choice questions need at least two options. For scales, you can set a minimum starting at 0 and a maximum up to 10. The preview updates as you edit so you can check the client experience.
When it is ready, click Save. From the forms list you can also edit, duplicate, or delete a template.
2. Add it to the client's plan
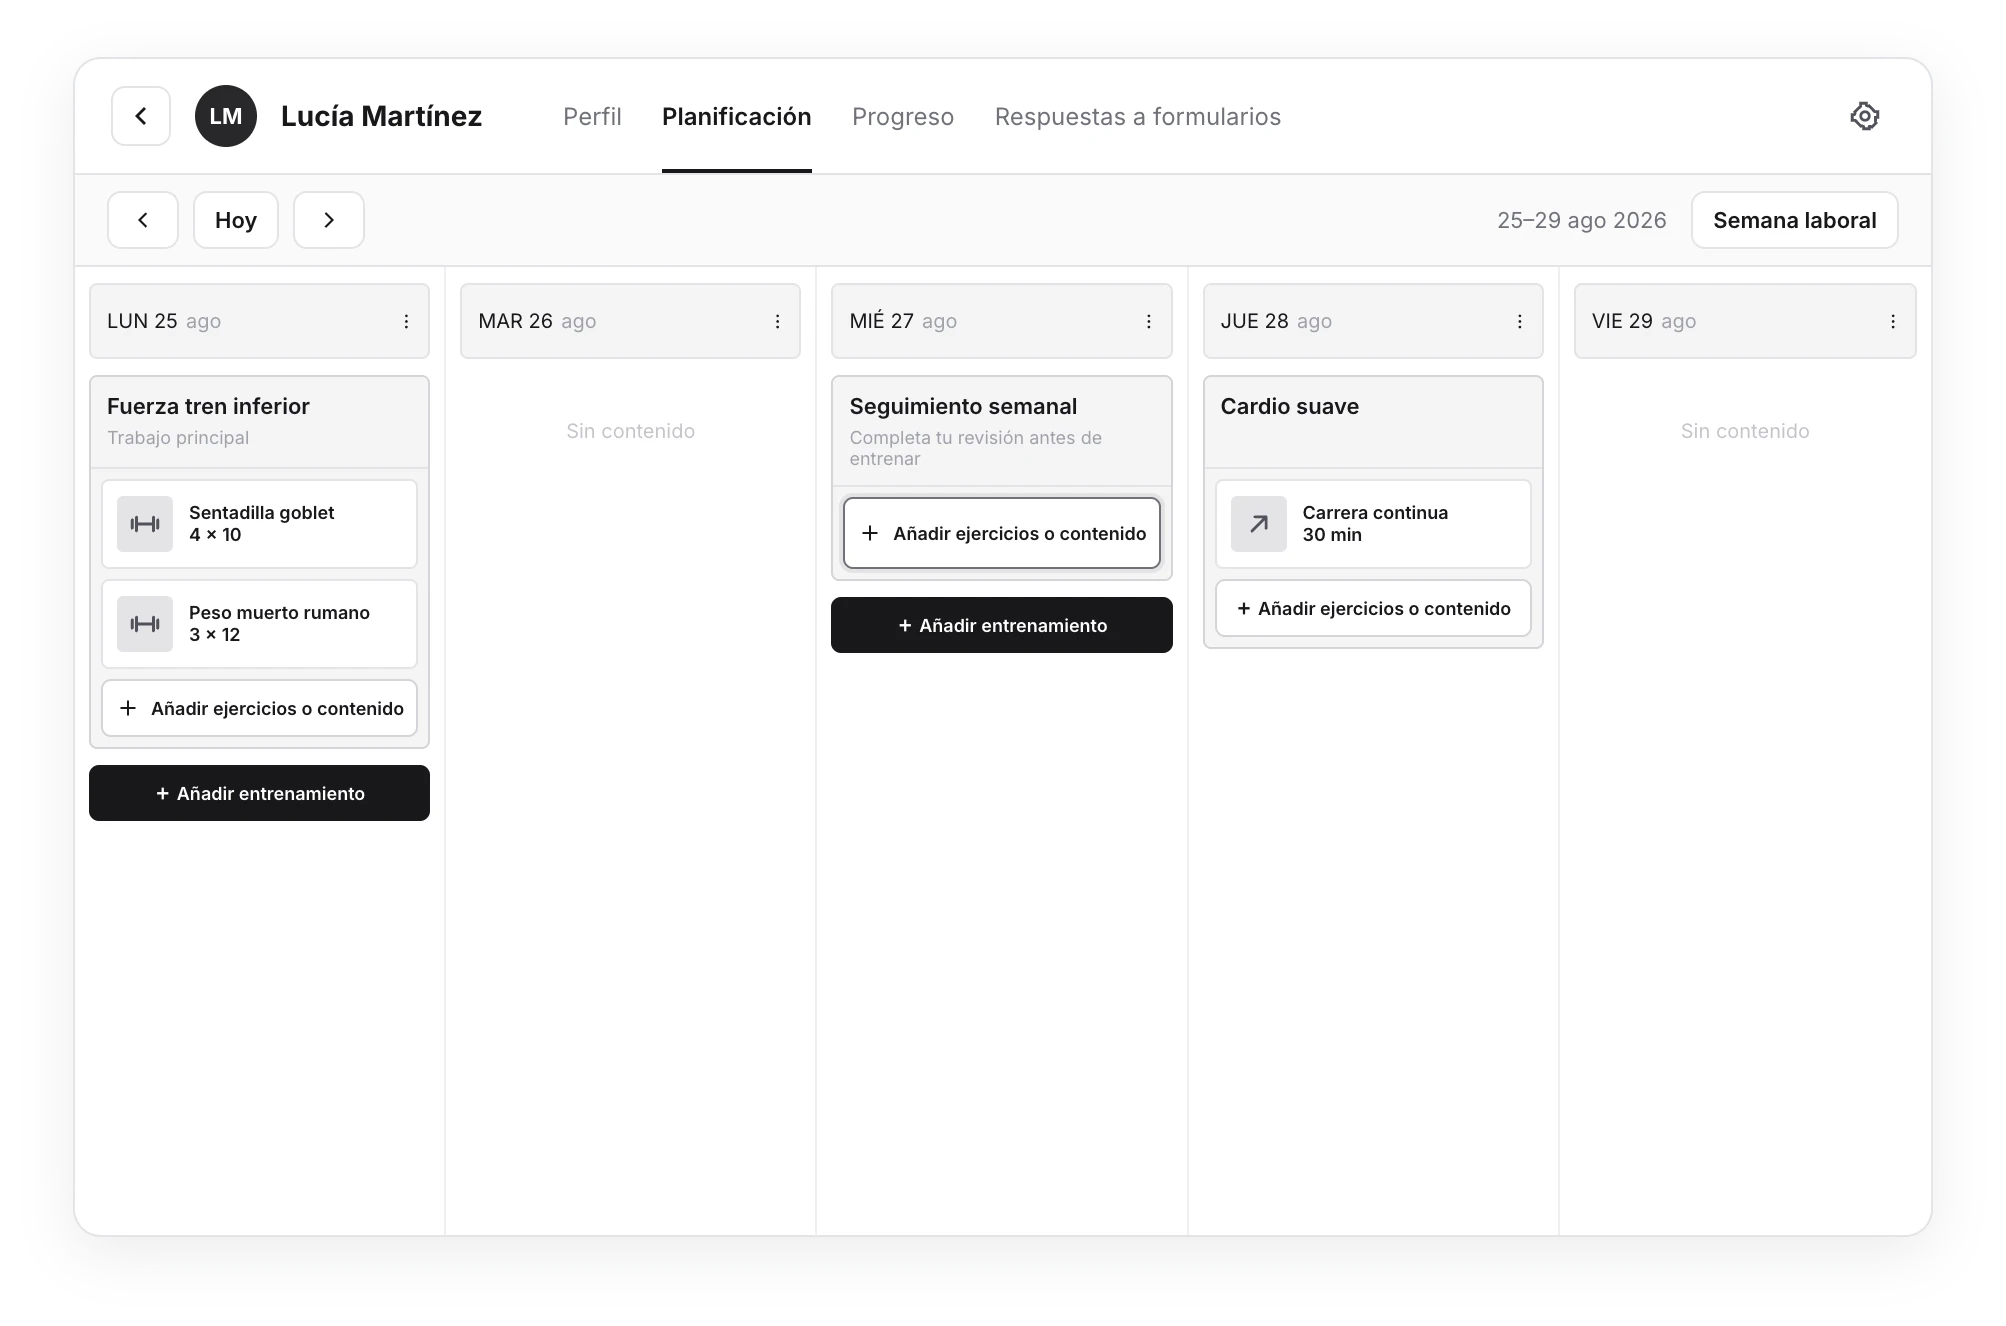
- Open the client profile and go to their Planner.
- Find the day when you want them to answer.
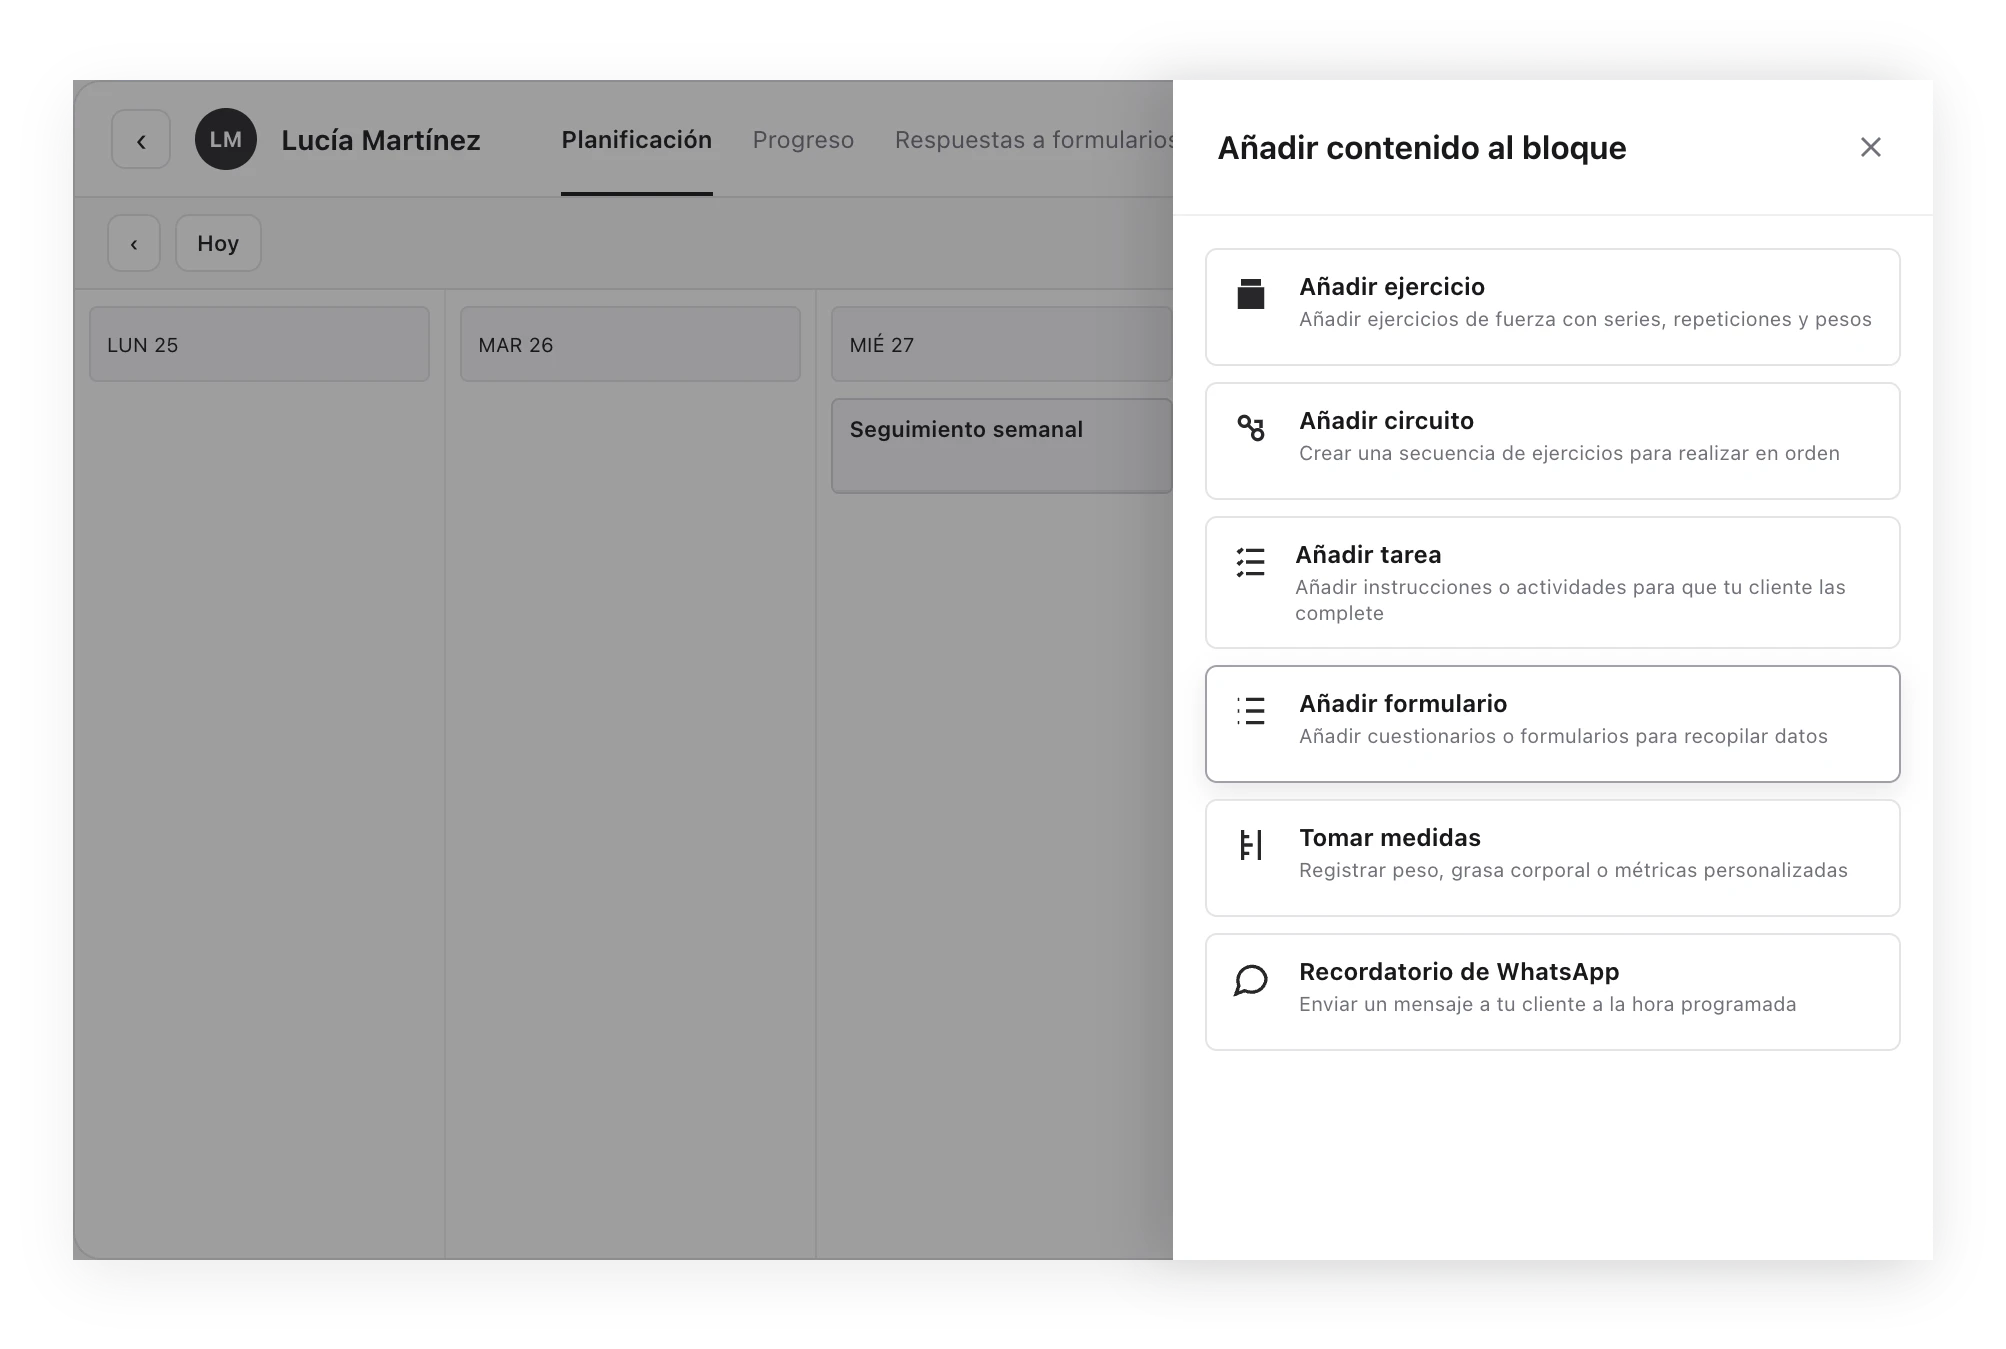
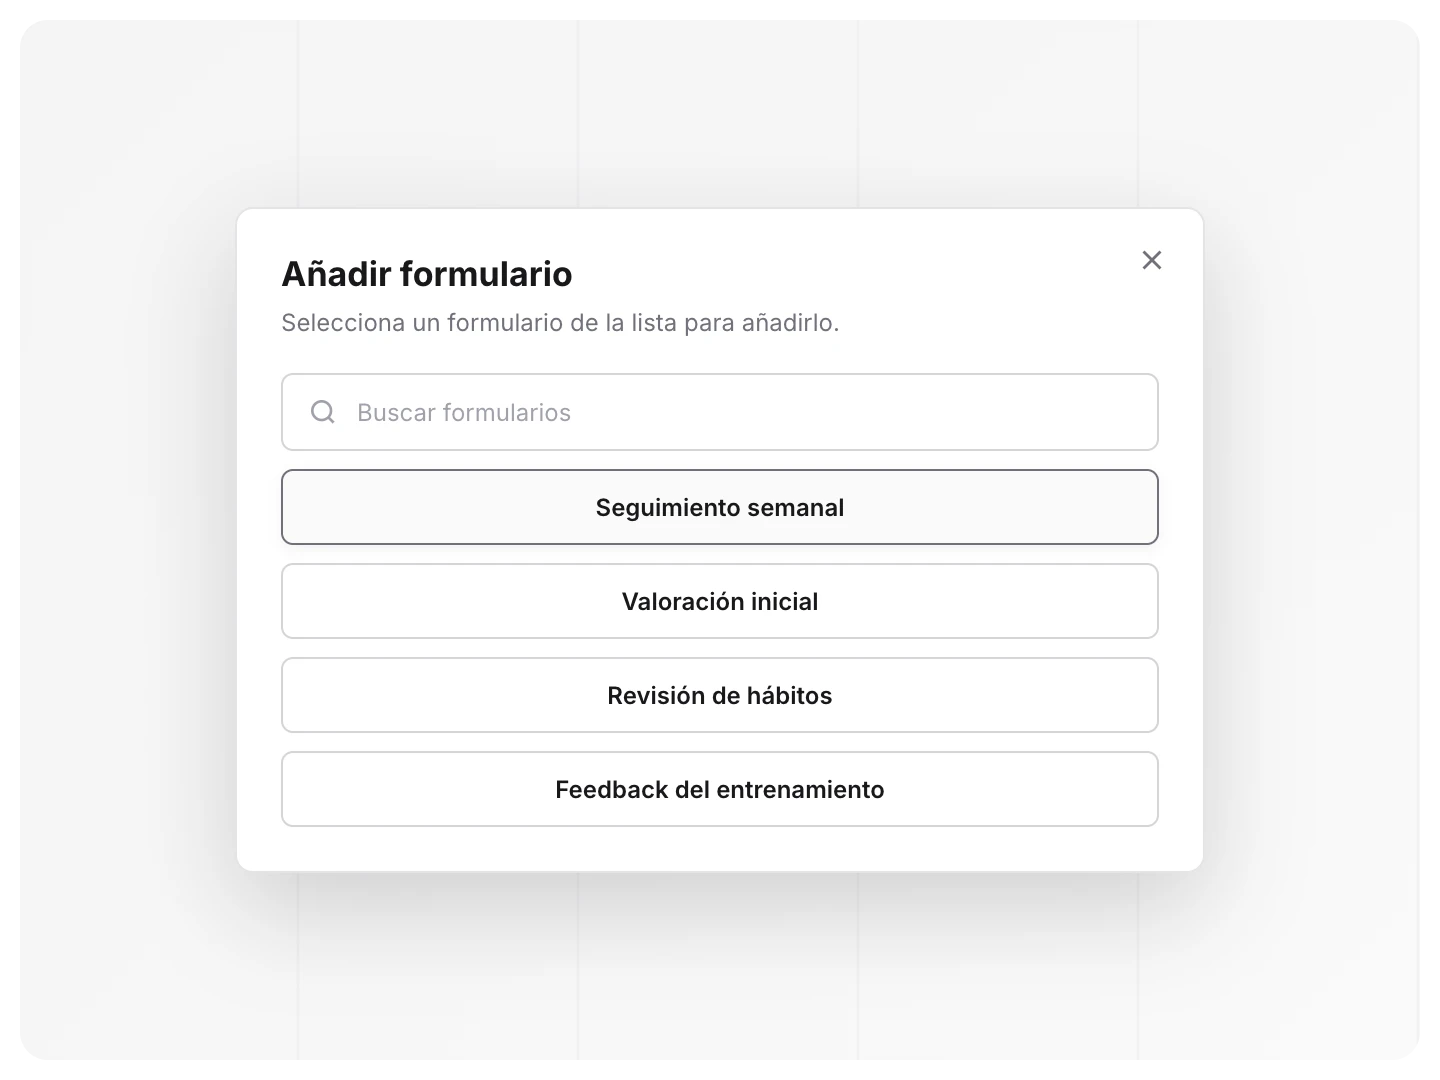
- In a block, click to add content and choose Add form.
- Search your library and select the form.
After clicking Add exercises or content, choose Add form, then find the template you created.
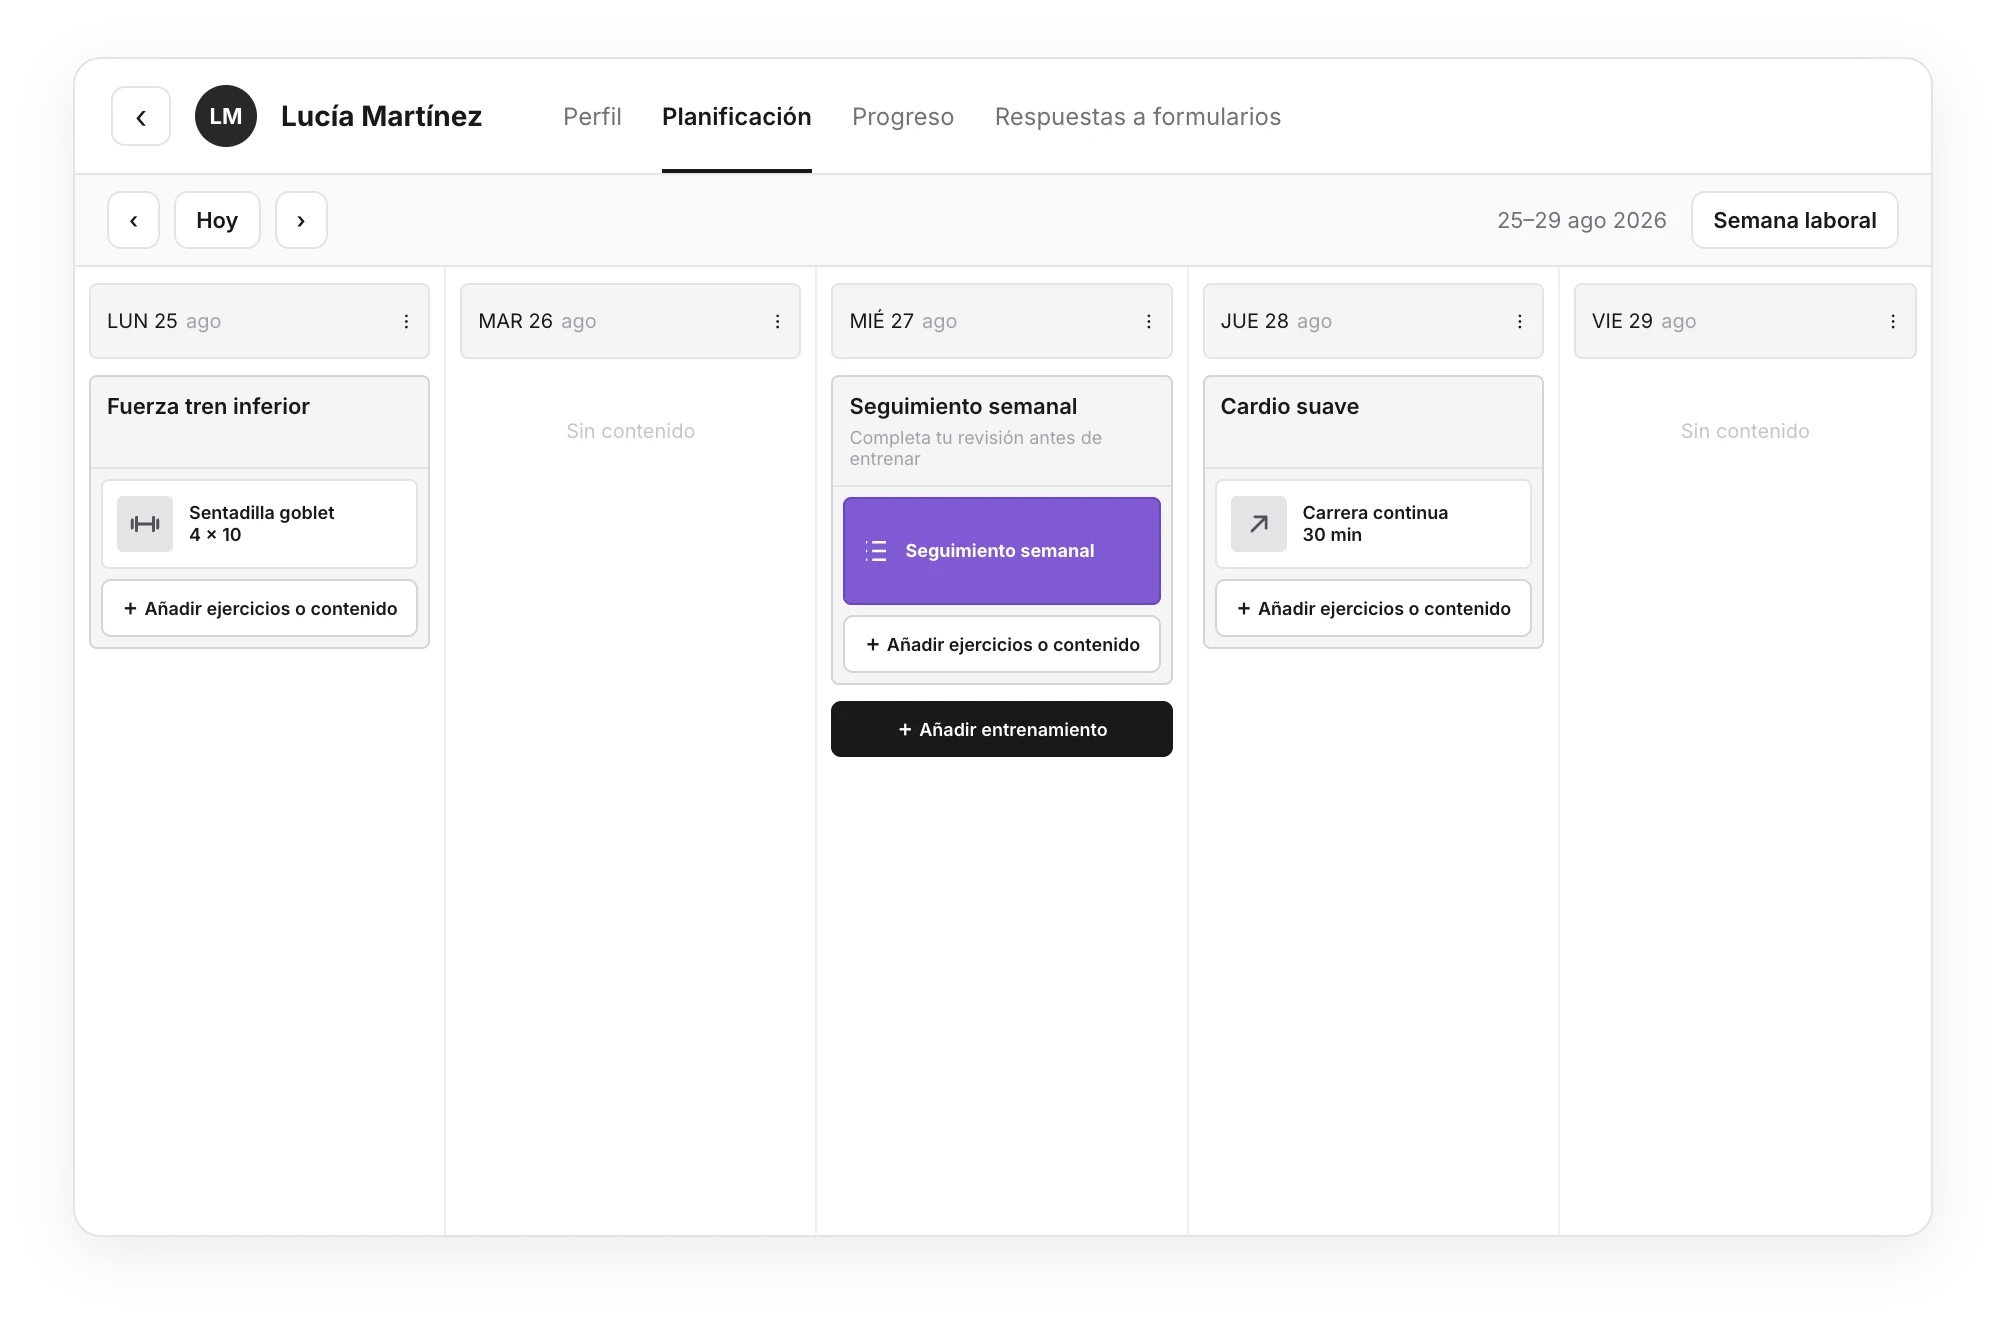
You can repeat the same form on different dates. For a weekly check-in, place it once per week so every submission contributes to its history and progress view.
When you assign it, TrainerStudio saves a copy of the questions for that day. If you later edit the library template, forms already in the plan keep their previous version. You can replace one from its planner card when you need to update it.
3. What the client does
The client opens the relevant day, enters the form, answers the questions, and taps Submit. They must answer every question for it to be marked as completed. If they have already submitted it, they can change their answers and tap Submit again.
You can then check the result under Form responses in their profile.